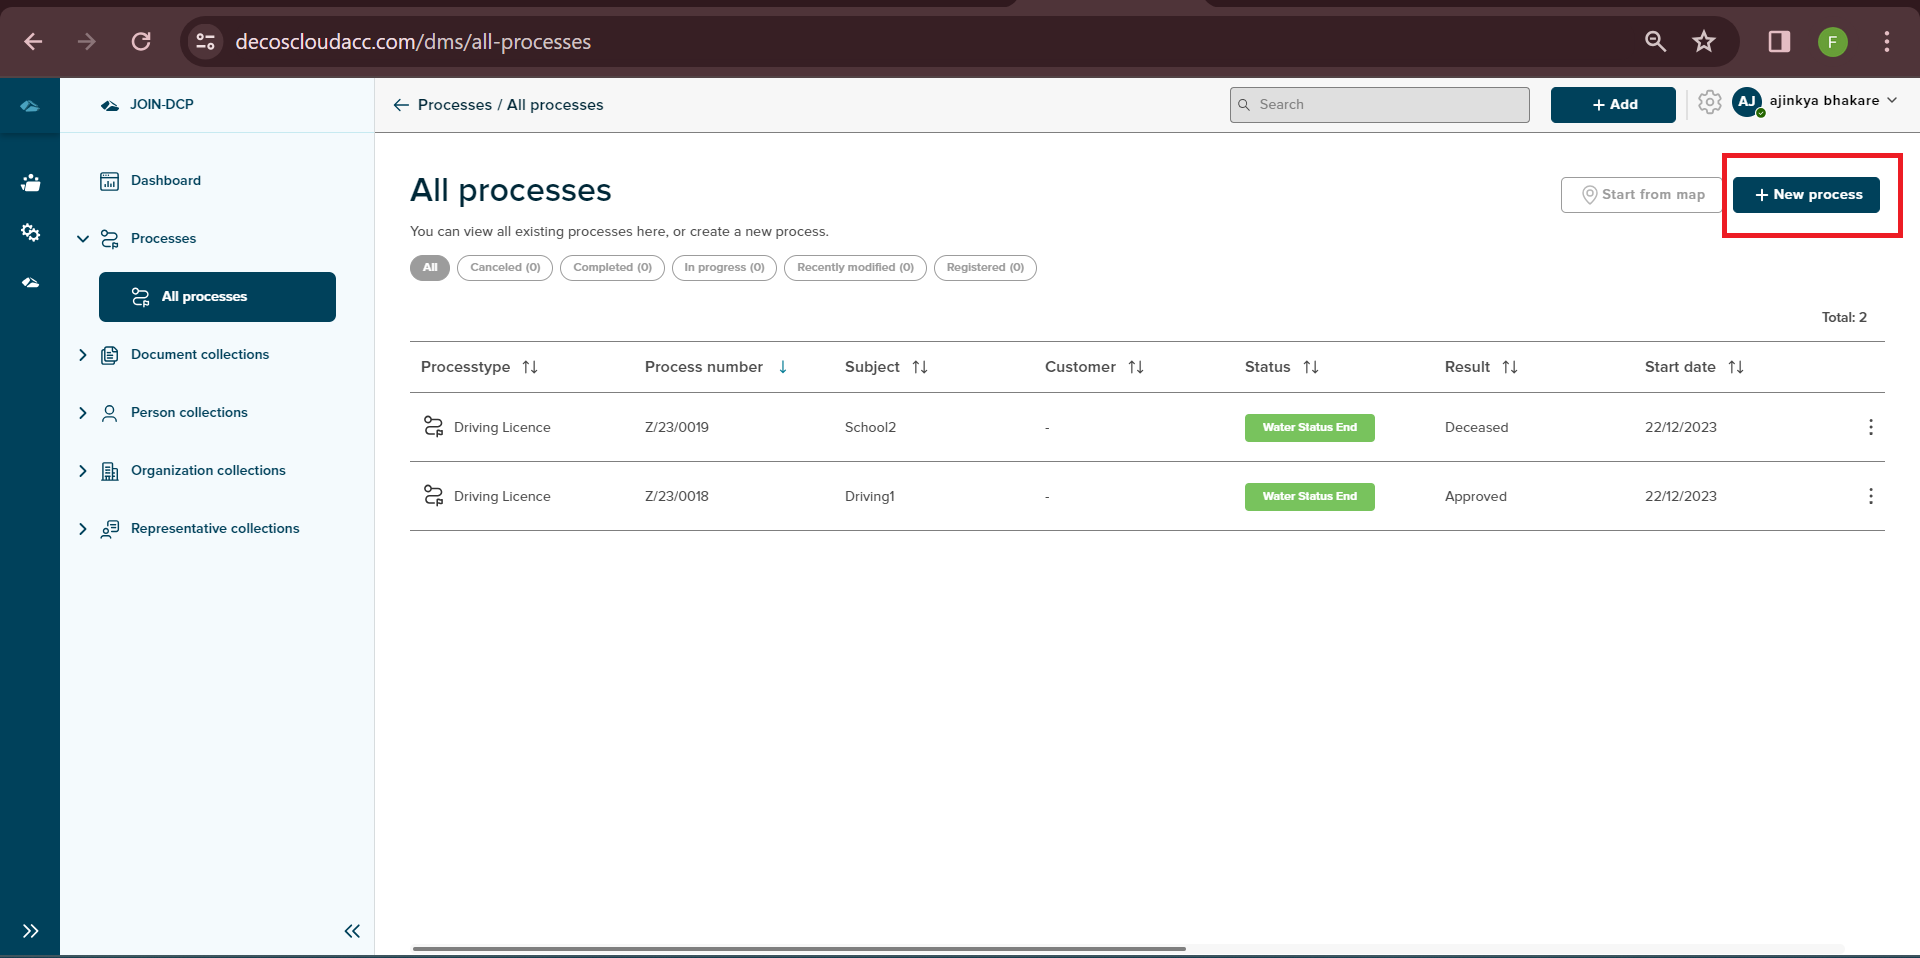
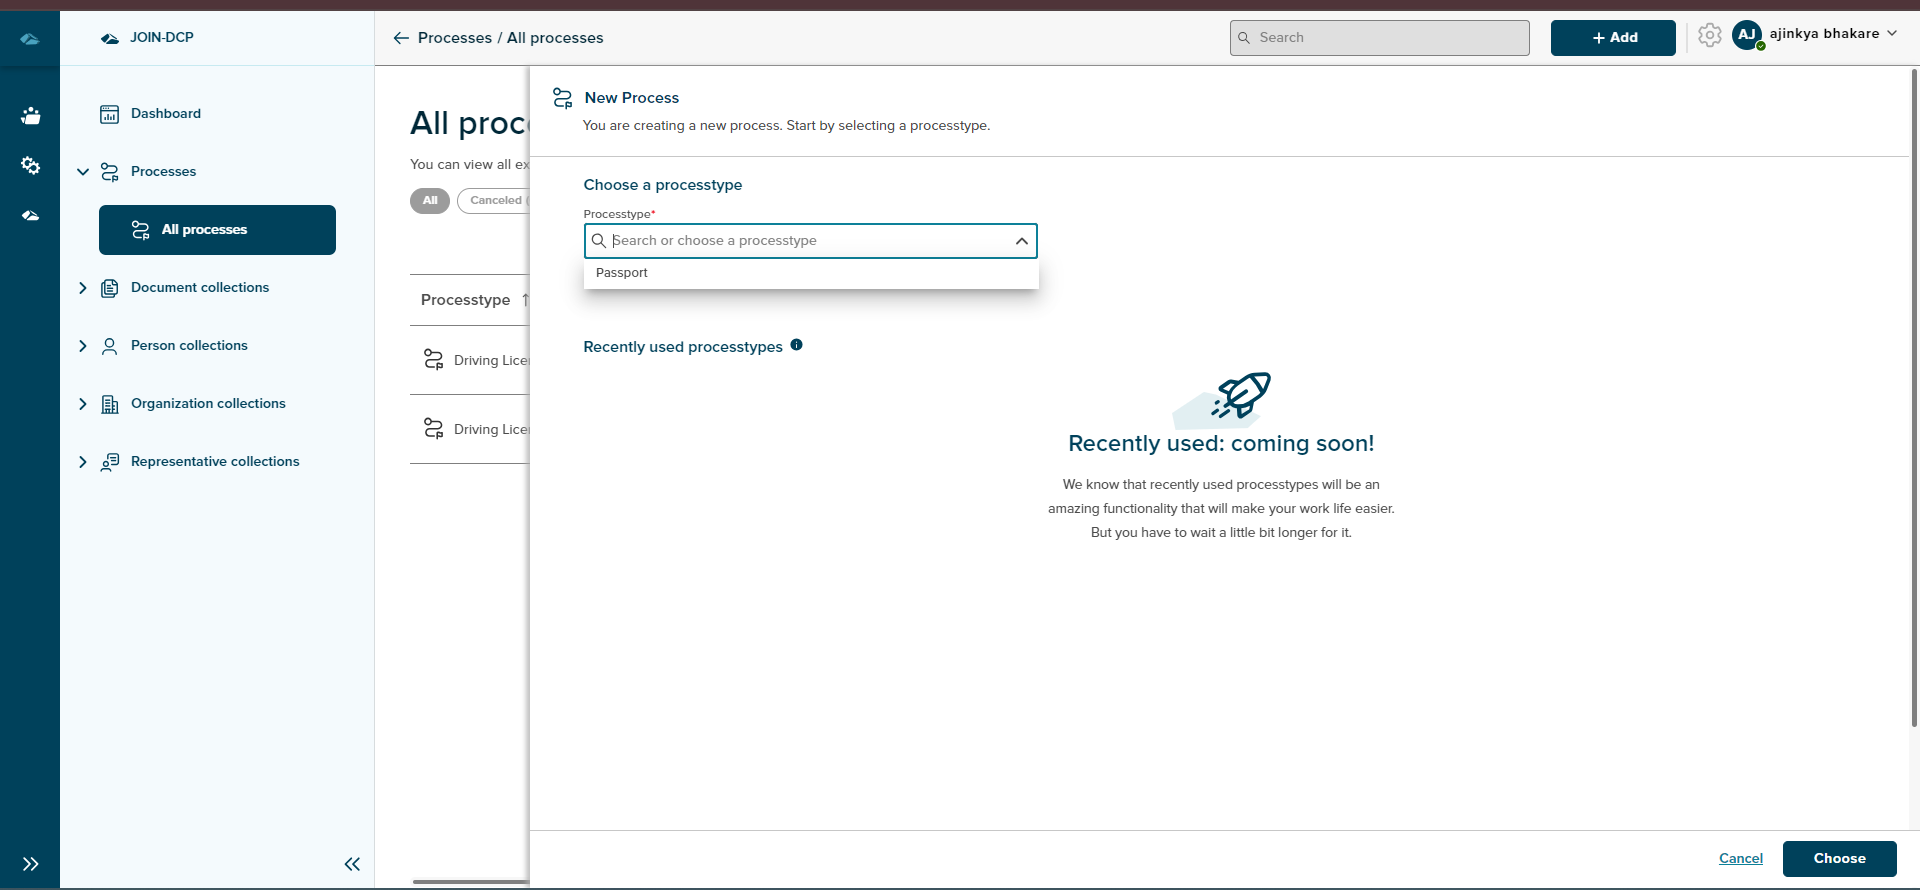
After clicking + New process, the side panel will be displayed with the Choose a process type dropdown. Users can select the Process type from the dropdown and users can see the information by expanding the View more information about which is displayed below :

¶ Process Creation
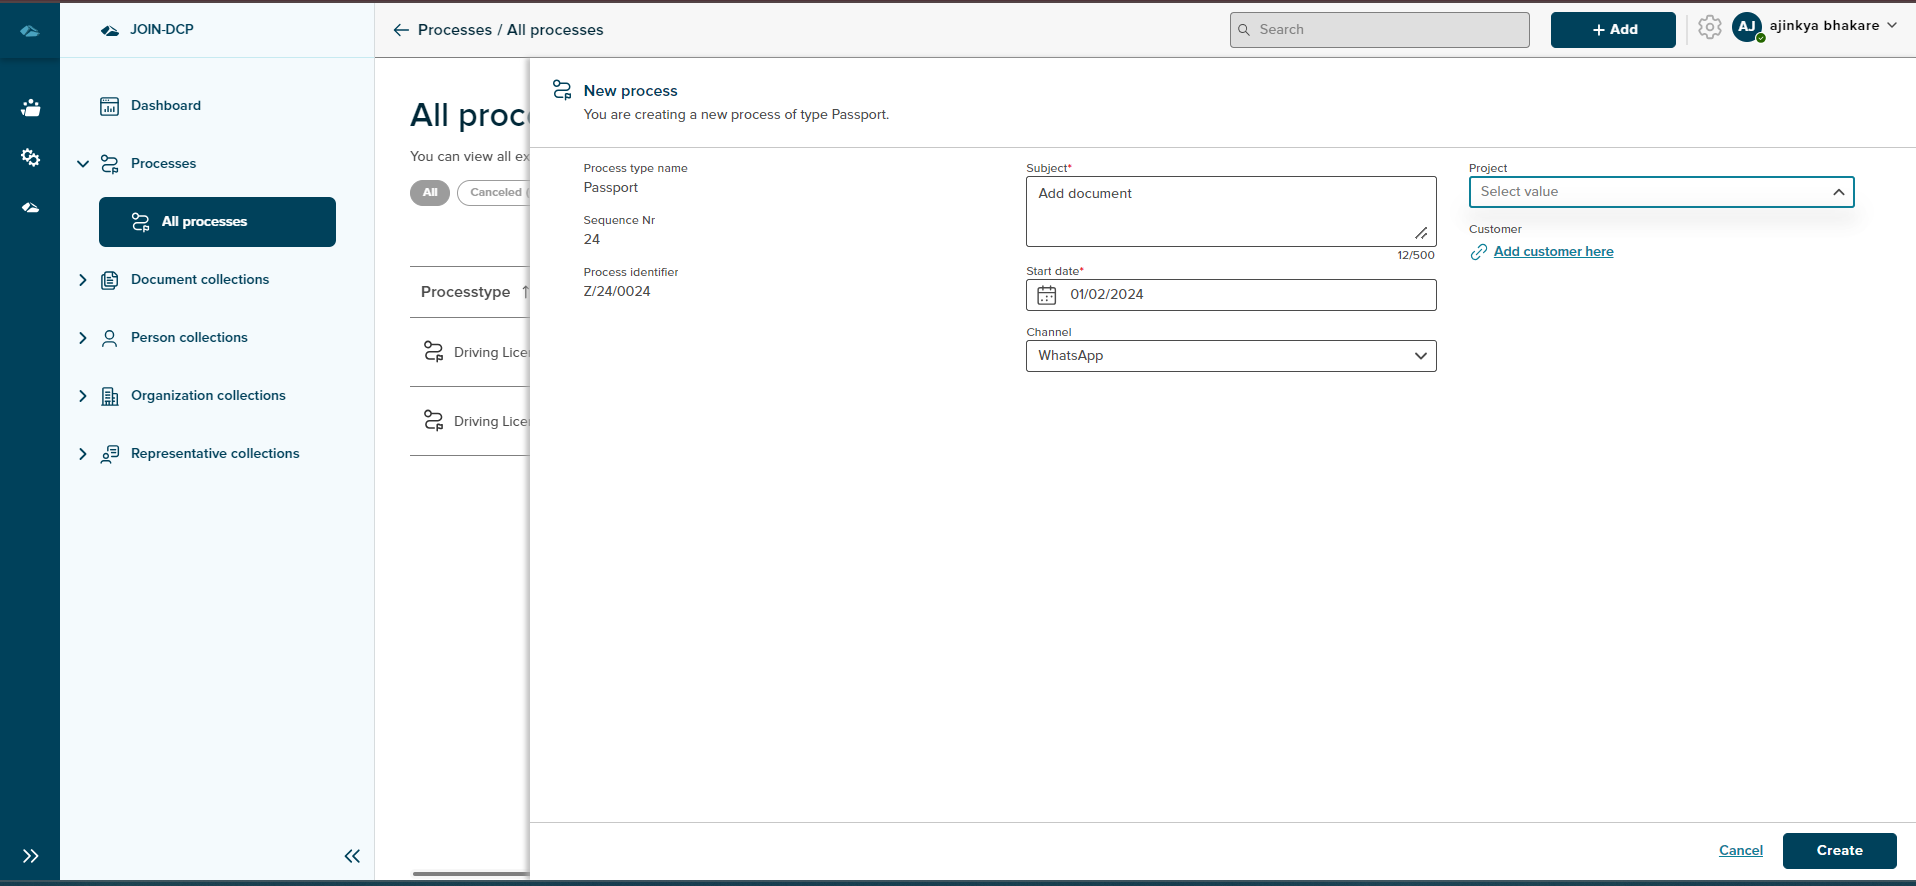
After clicking on the Choose button. Users can fill in the input fields of different parameters and click the Create button. The creation form of the Process can be seen in the image below. Clicking the Cancel button will close the side panel and cancel the creation process.
After clicking on the Create button, the user will displayed with the details page of the created Process in the side panel and will have the View Details and Close buttons.
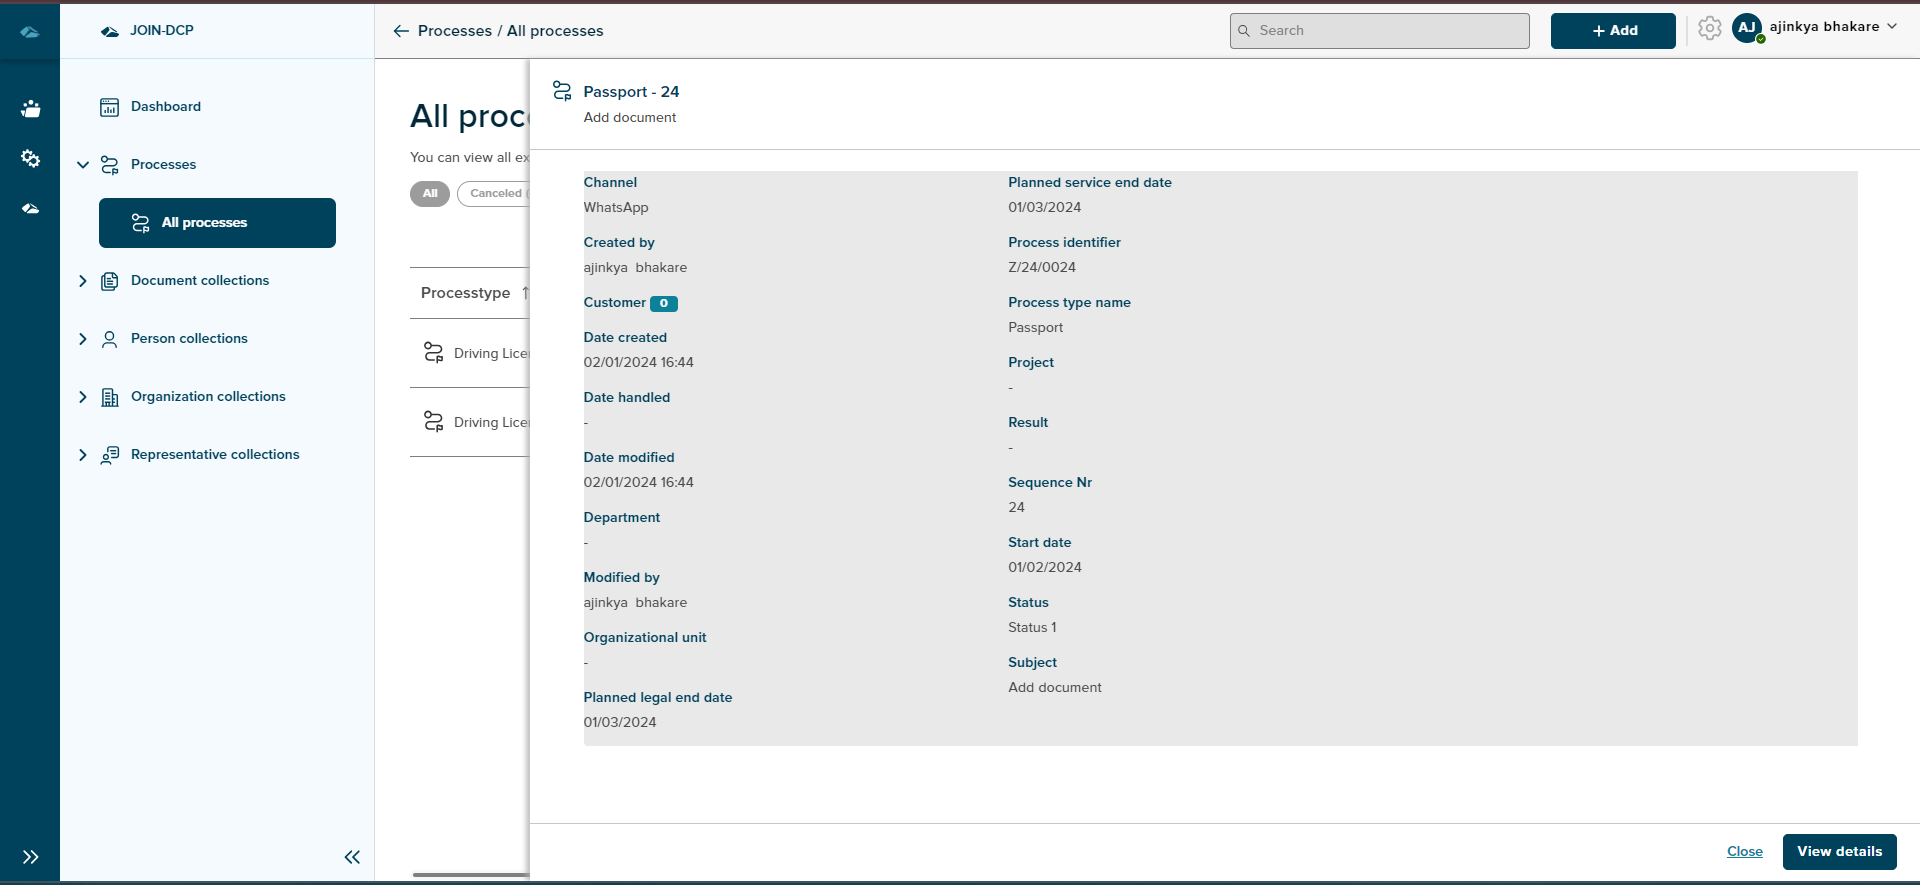
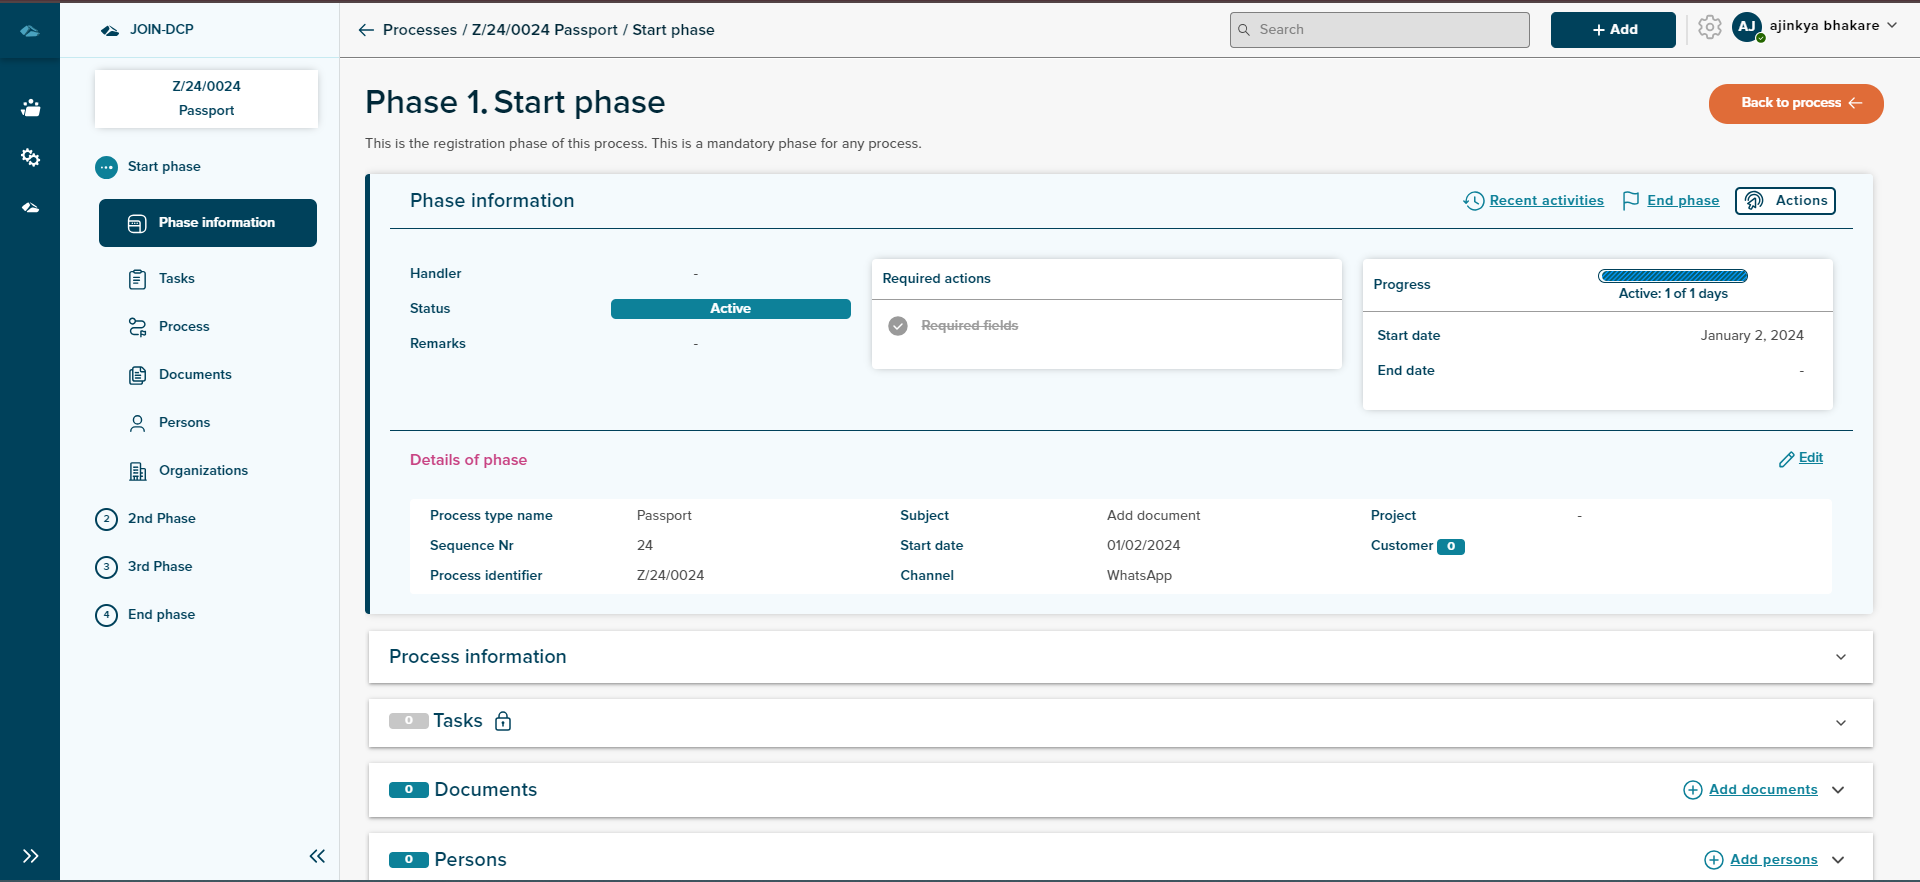
After clicking the View details button, the User lands on the details page of all the Phases.
Users can click on Back to process and then Back to list. From here, in the grid, users can see all the processes that are created.

On the All process grid, the User can see the different columns which are listed below
1. Process type: Here, users can see all the created processes.
2. Process number:.
3. Subject: Here, users can see the subject they added while creating the process.
4. Customer: Here, users can see linked customers.
5. Status: Here, users can see the Status which is linked with each Phase, and the Status will change according to the Phase.
6. Result: Here, users can see the Result of the Process.
7. Start date: Here, users can see the Start date of the Created Processes.
8. Expected end date: Here, users can view the anticipated end date of the processes while creating the process type…
9. End date: Here, users can view the end date of the Processes.
10. Created by: Here, users can view the name of the user who created the process.
11. Modified by: Here, users can view the name of the user who modified the process.
12. Modified date: Here, users can view the date on which the processes were modified.
13.Confidentially:
Each of the processes will have the kebab menu options, such as Details, Open in Sidepanel, Edit Metadata and Delete. options can be seen in the below image.
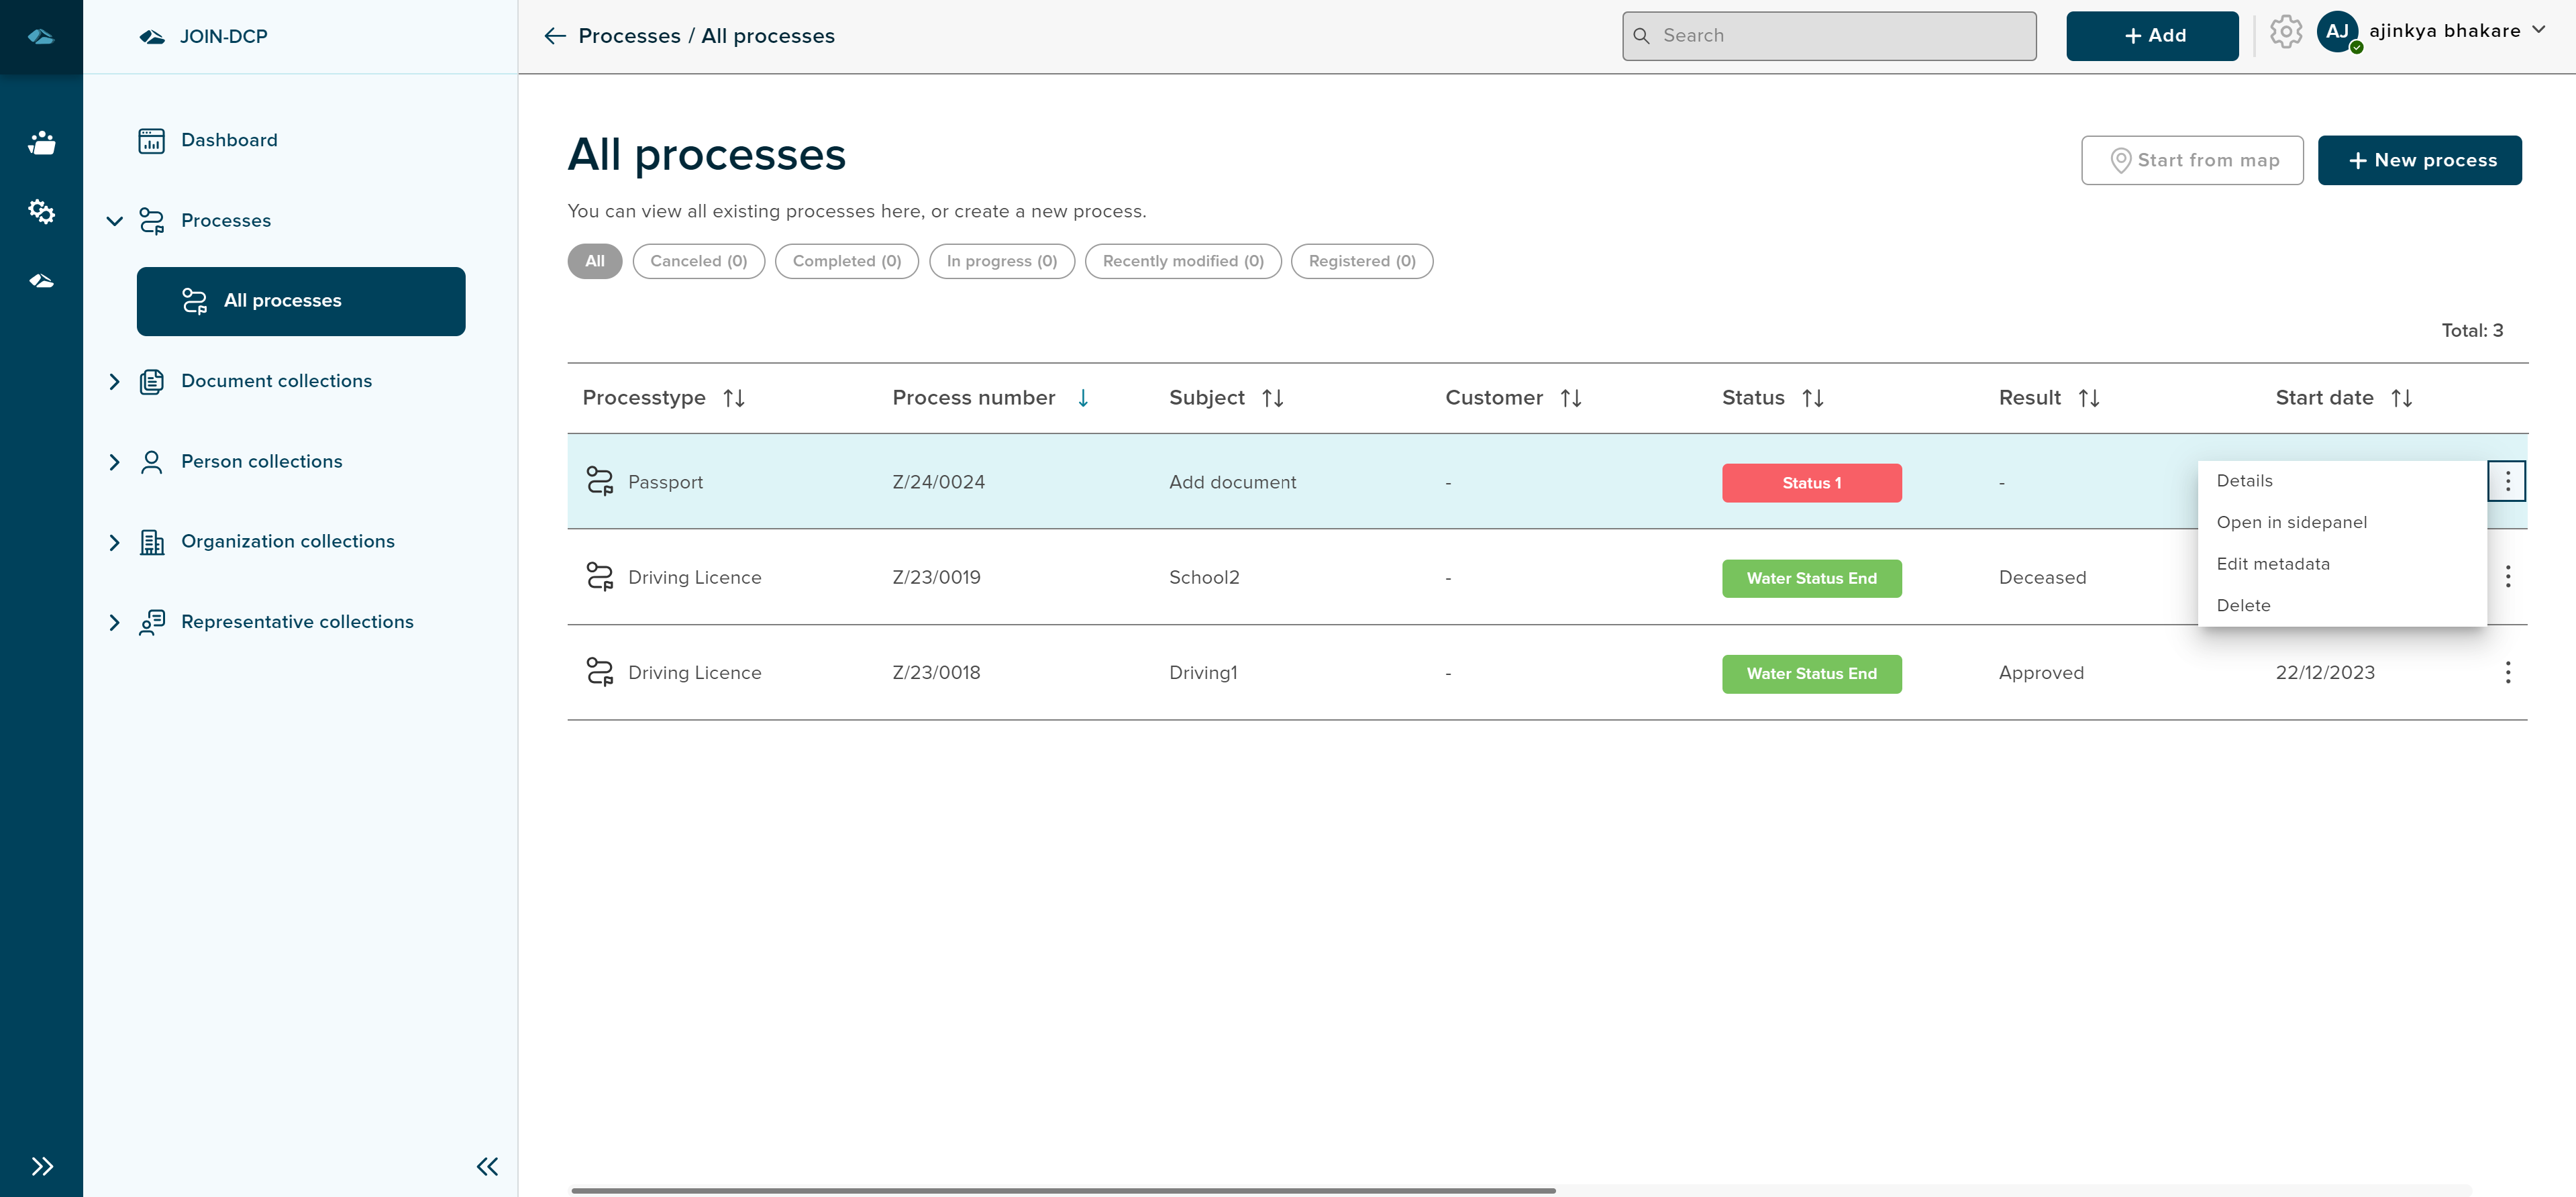
- Details - Clicking on this option will open the details page of the Process.
- Open in Sidepanel - Clicking on this option will open the details of the process in the side panel.
- Edit metadata - Clicking on this option will open the details page of the process with general information in edit mode.
- Delete - Clicking on this option will give a pop-up to confirm whether to delete the process or not.
¶ Manage Process
When User is on Process list view, and clicksthe the on kebab menu and then Details page, User will land in the details page of the Process, where user can see the details of that process.
Click on the link below to navigate to the Detail page of the Process.
The user can drag and drop files of different formats in the grid. Once user drops the file on the screen, a side panel is opened and displays all the existing processes either user can choose an existing process or create new process by clicking on the create button.
¶ File Viewer
The userthe can see all the files added to process, by clicking on the file viewer icon, next to kabab menu for each of the process.
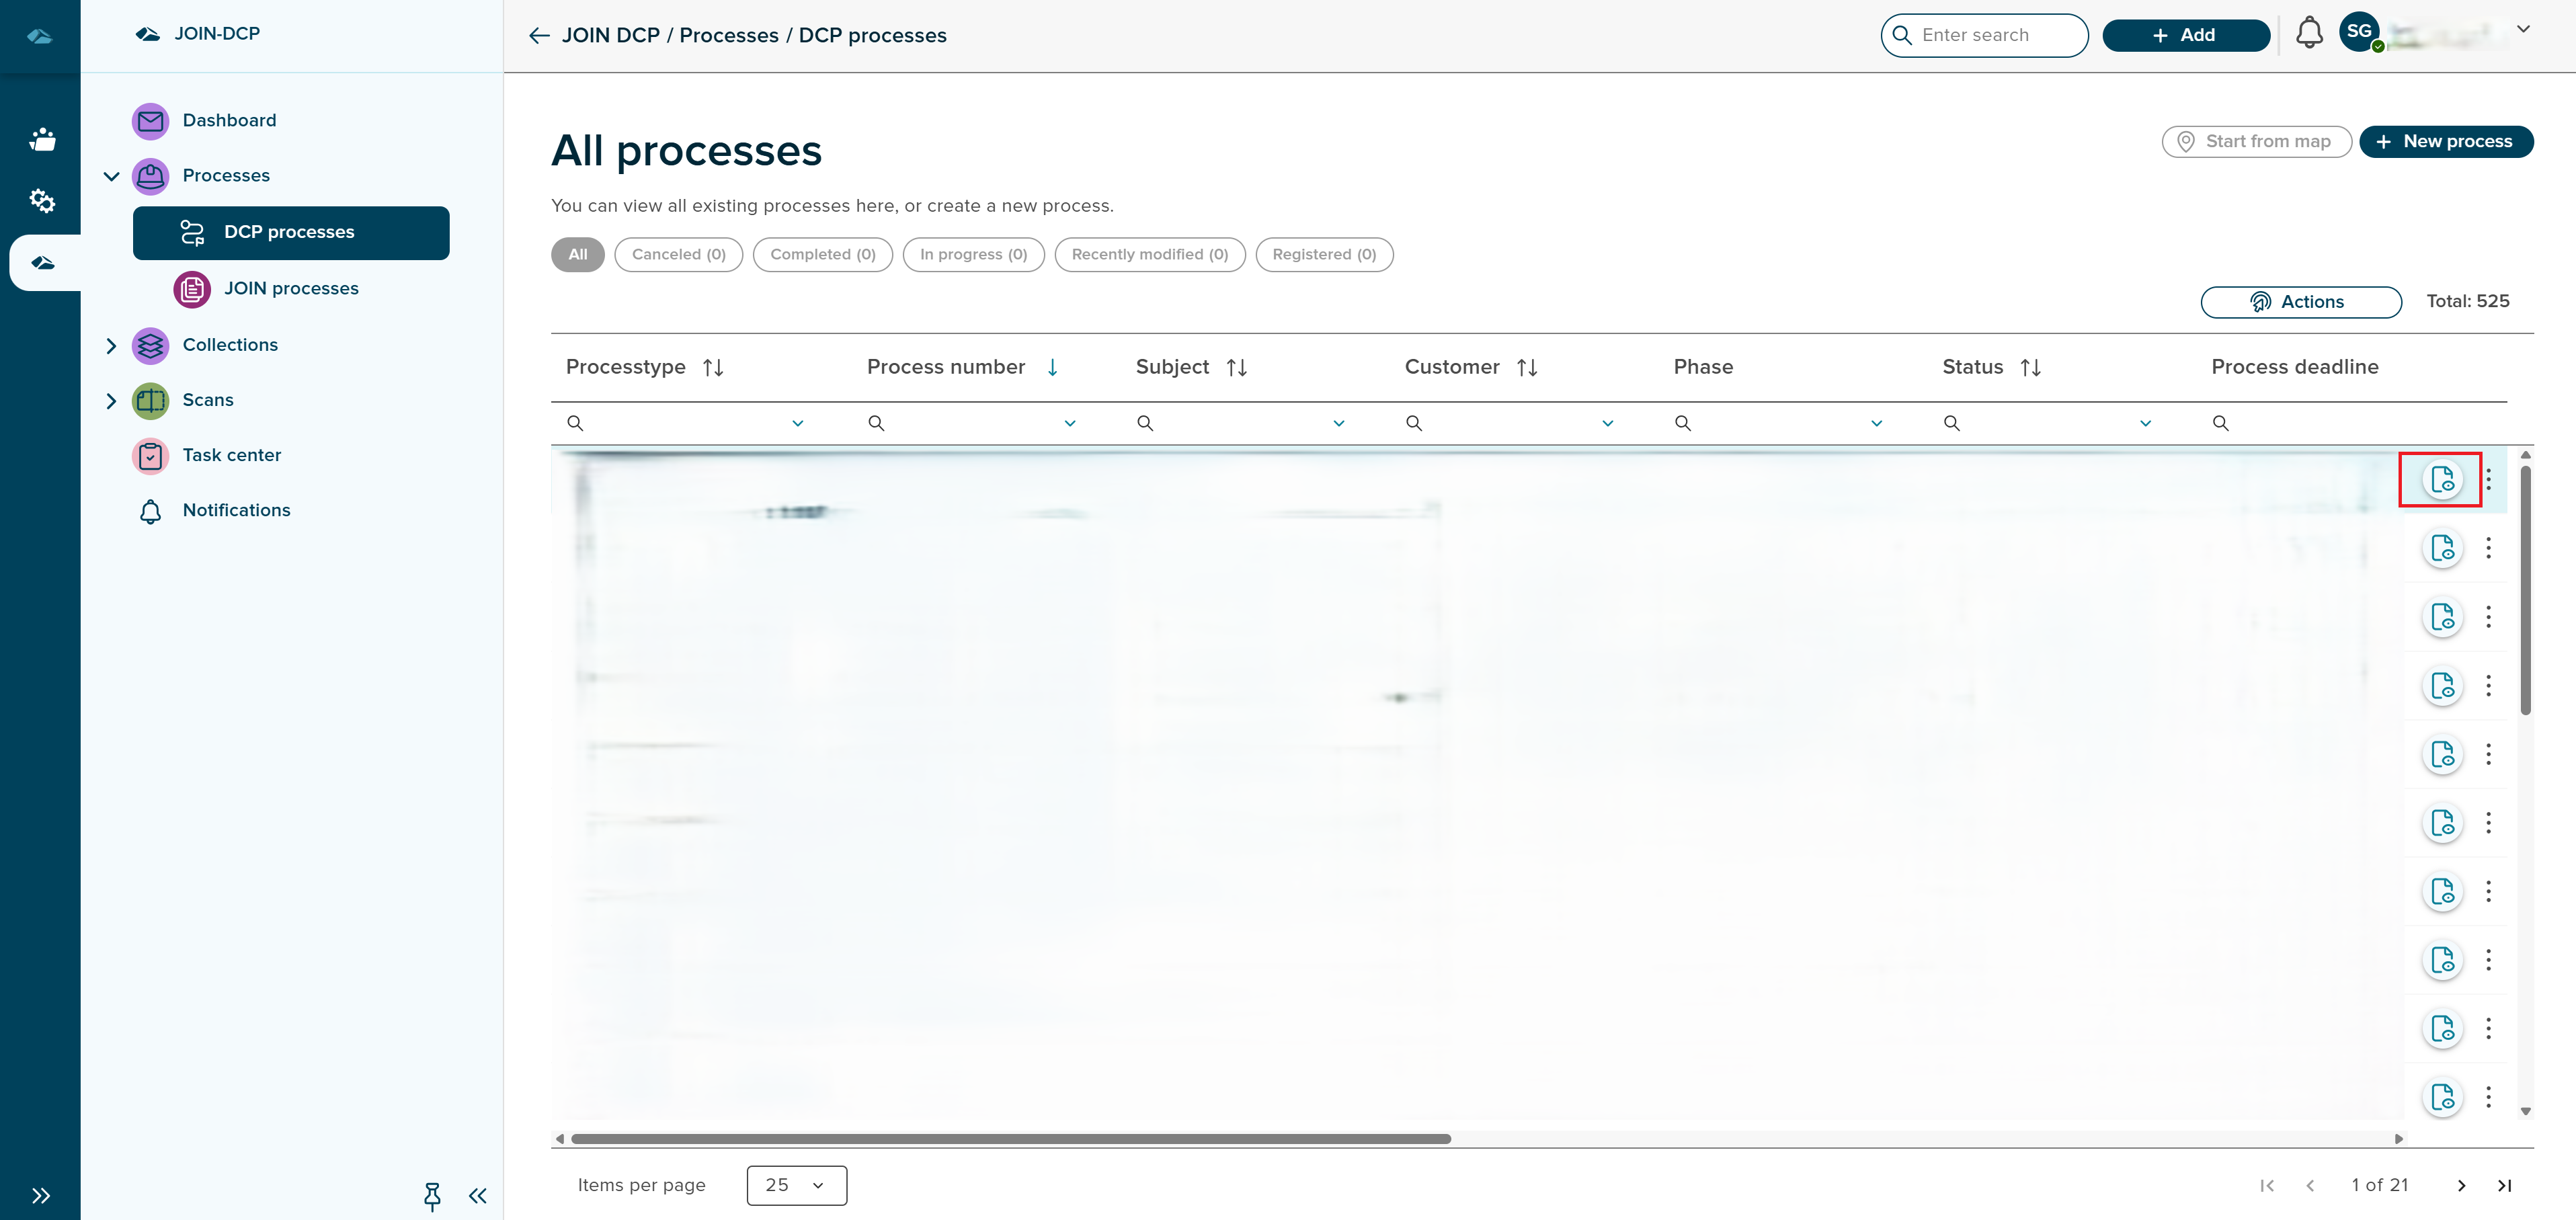
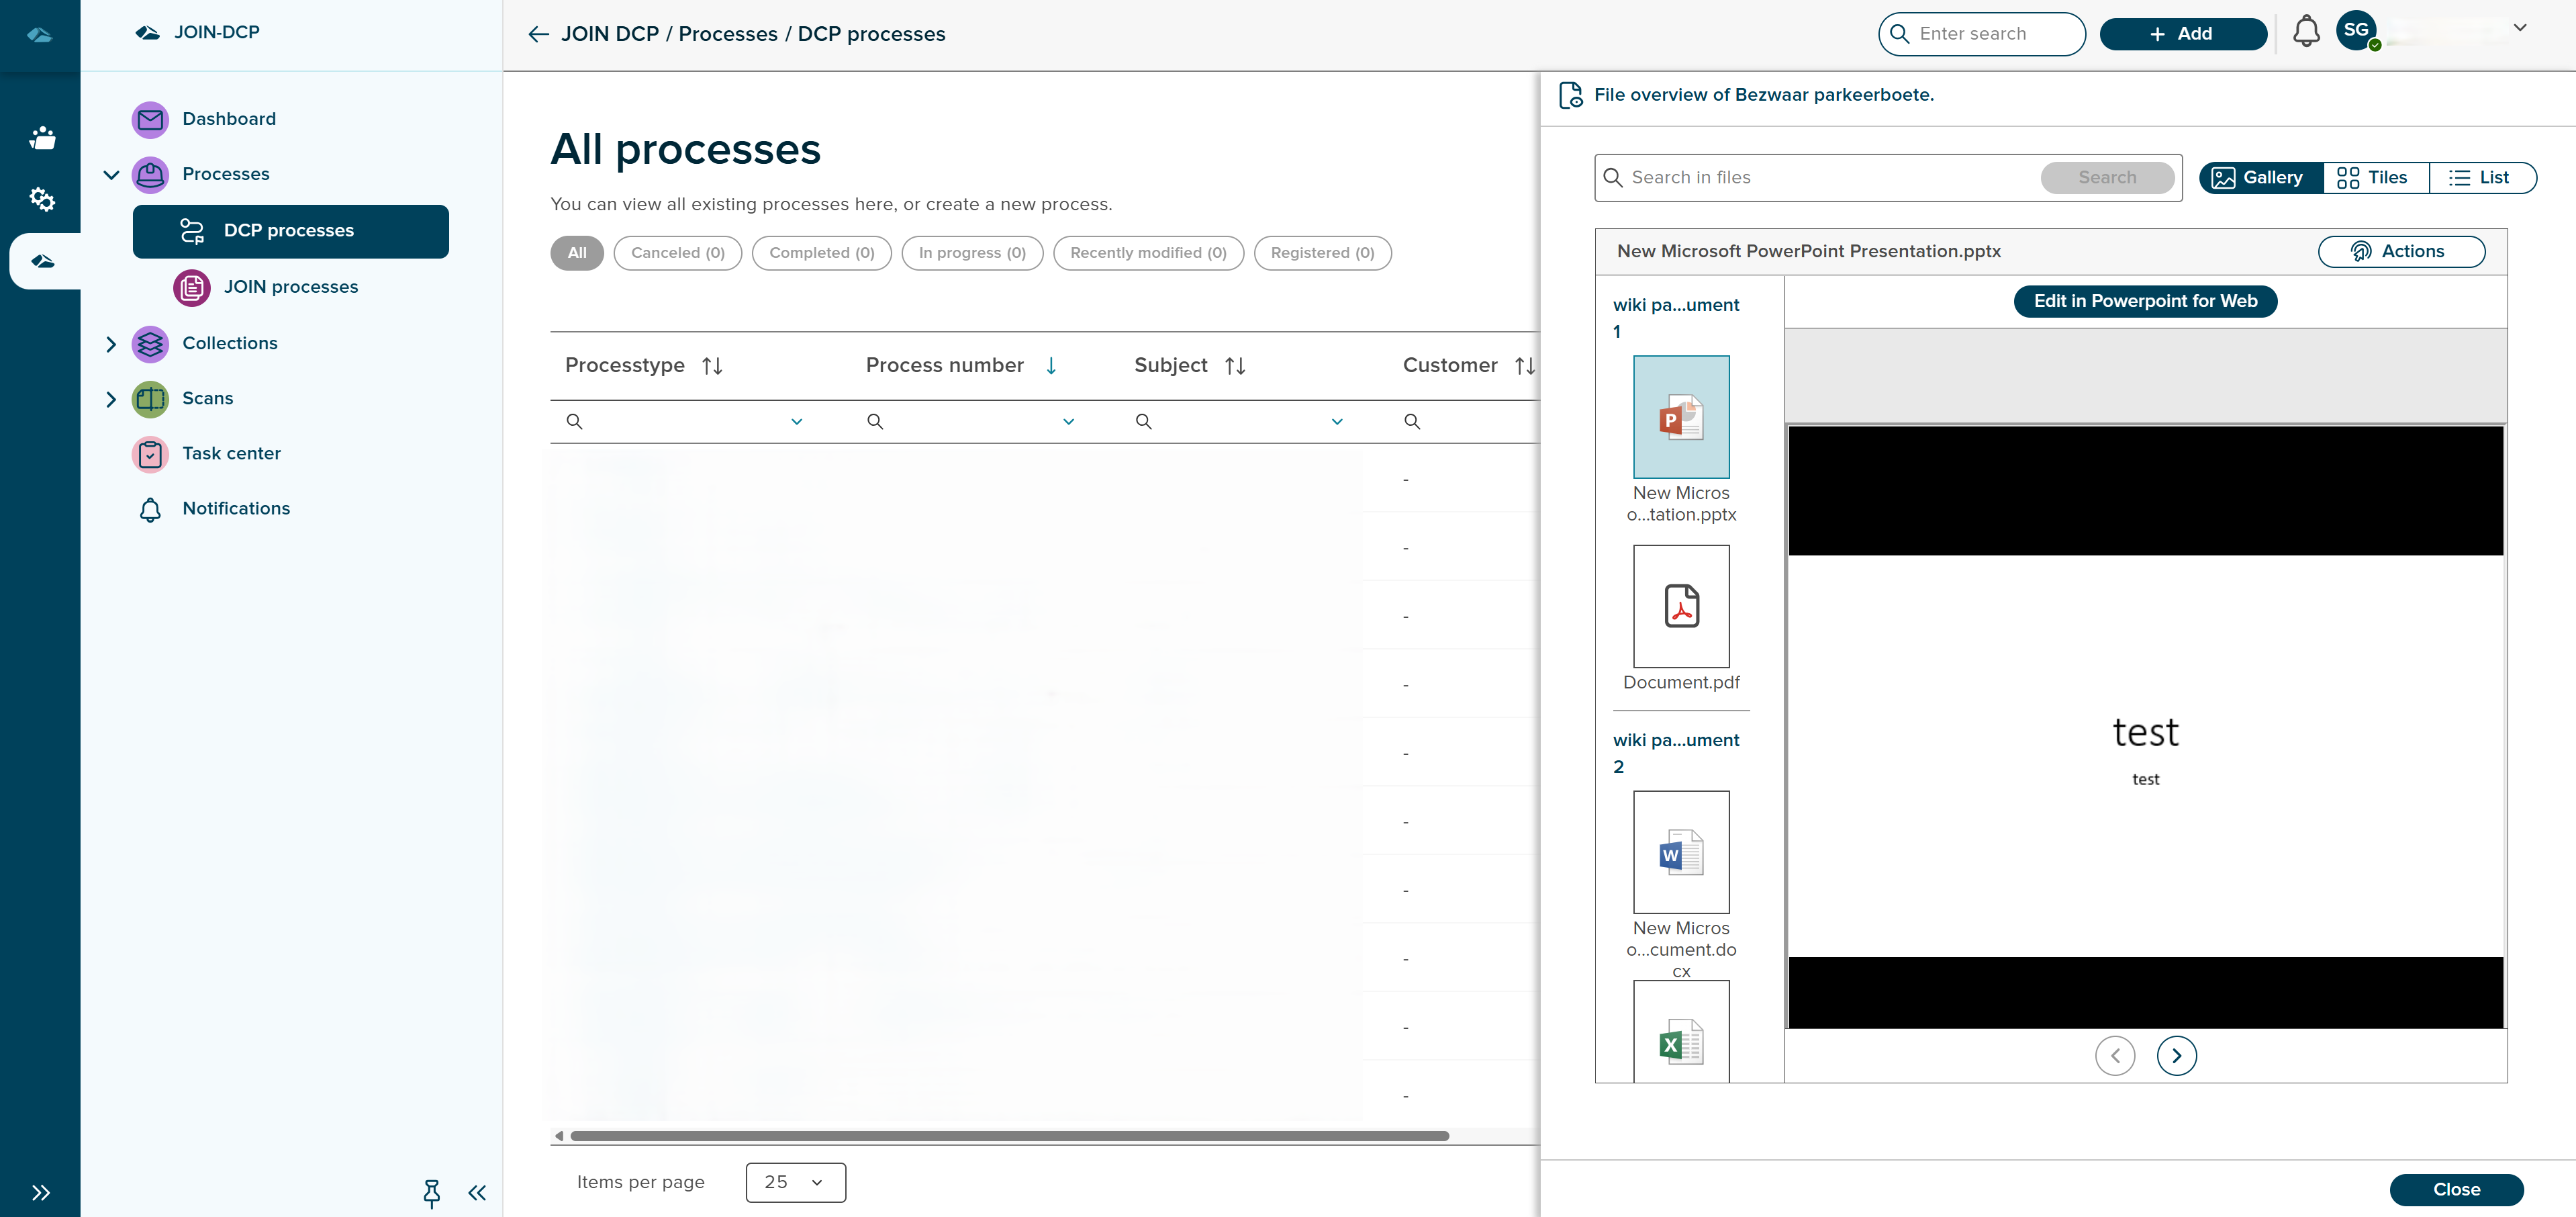
Once user clicks on the icon, the ,the The side panel will be opened and it shows the files in different views, by default files will be displayed in the Gallery view.
In Gallery view, user can see the details of the page inside. User can navigate between files and see the details inside them. Different files are separated based on their documents. The user can see edit button on the top to edit in a new tab.
An action button is also present to see the details, edit metadata and download. The user can navigate to different views by clicking on the tiles view
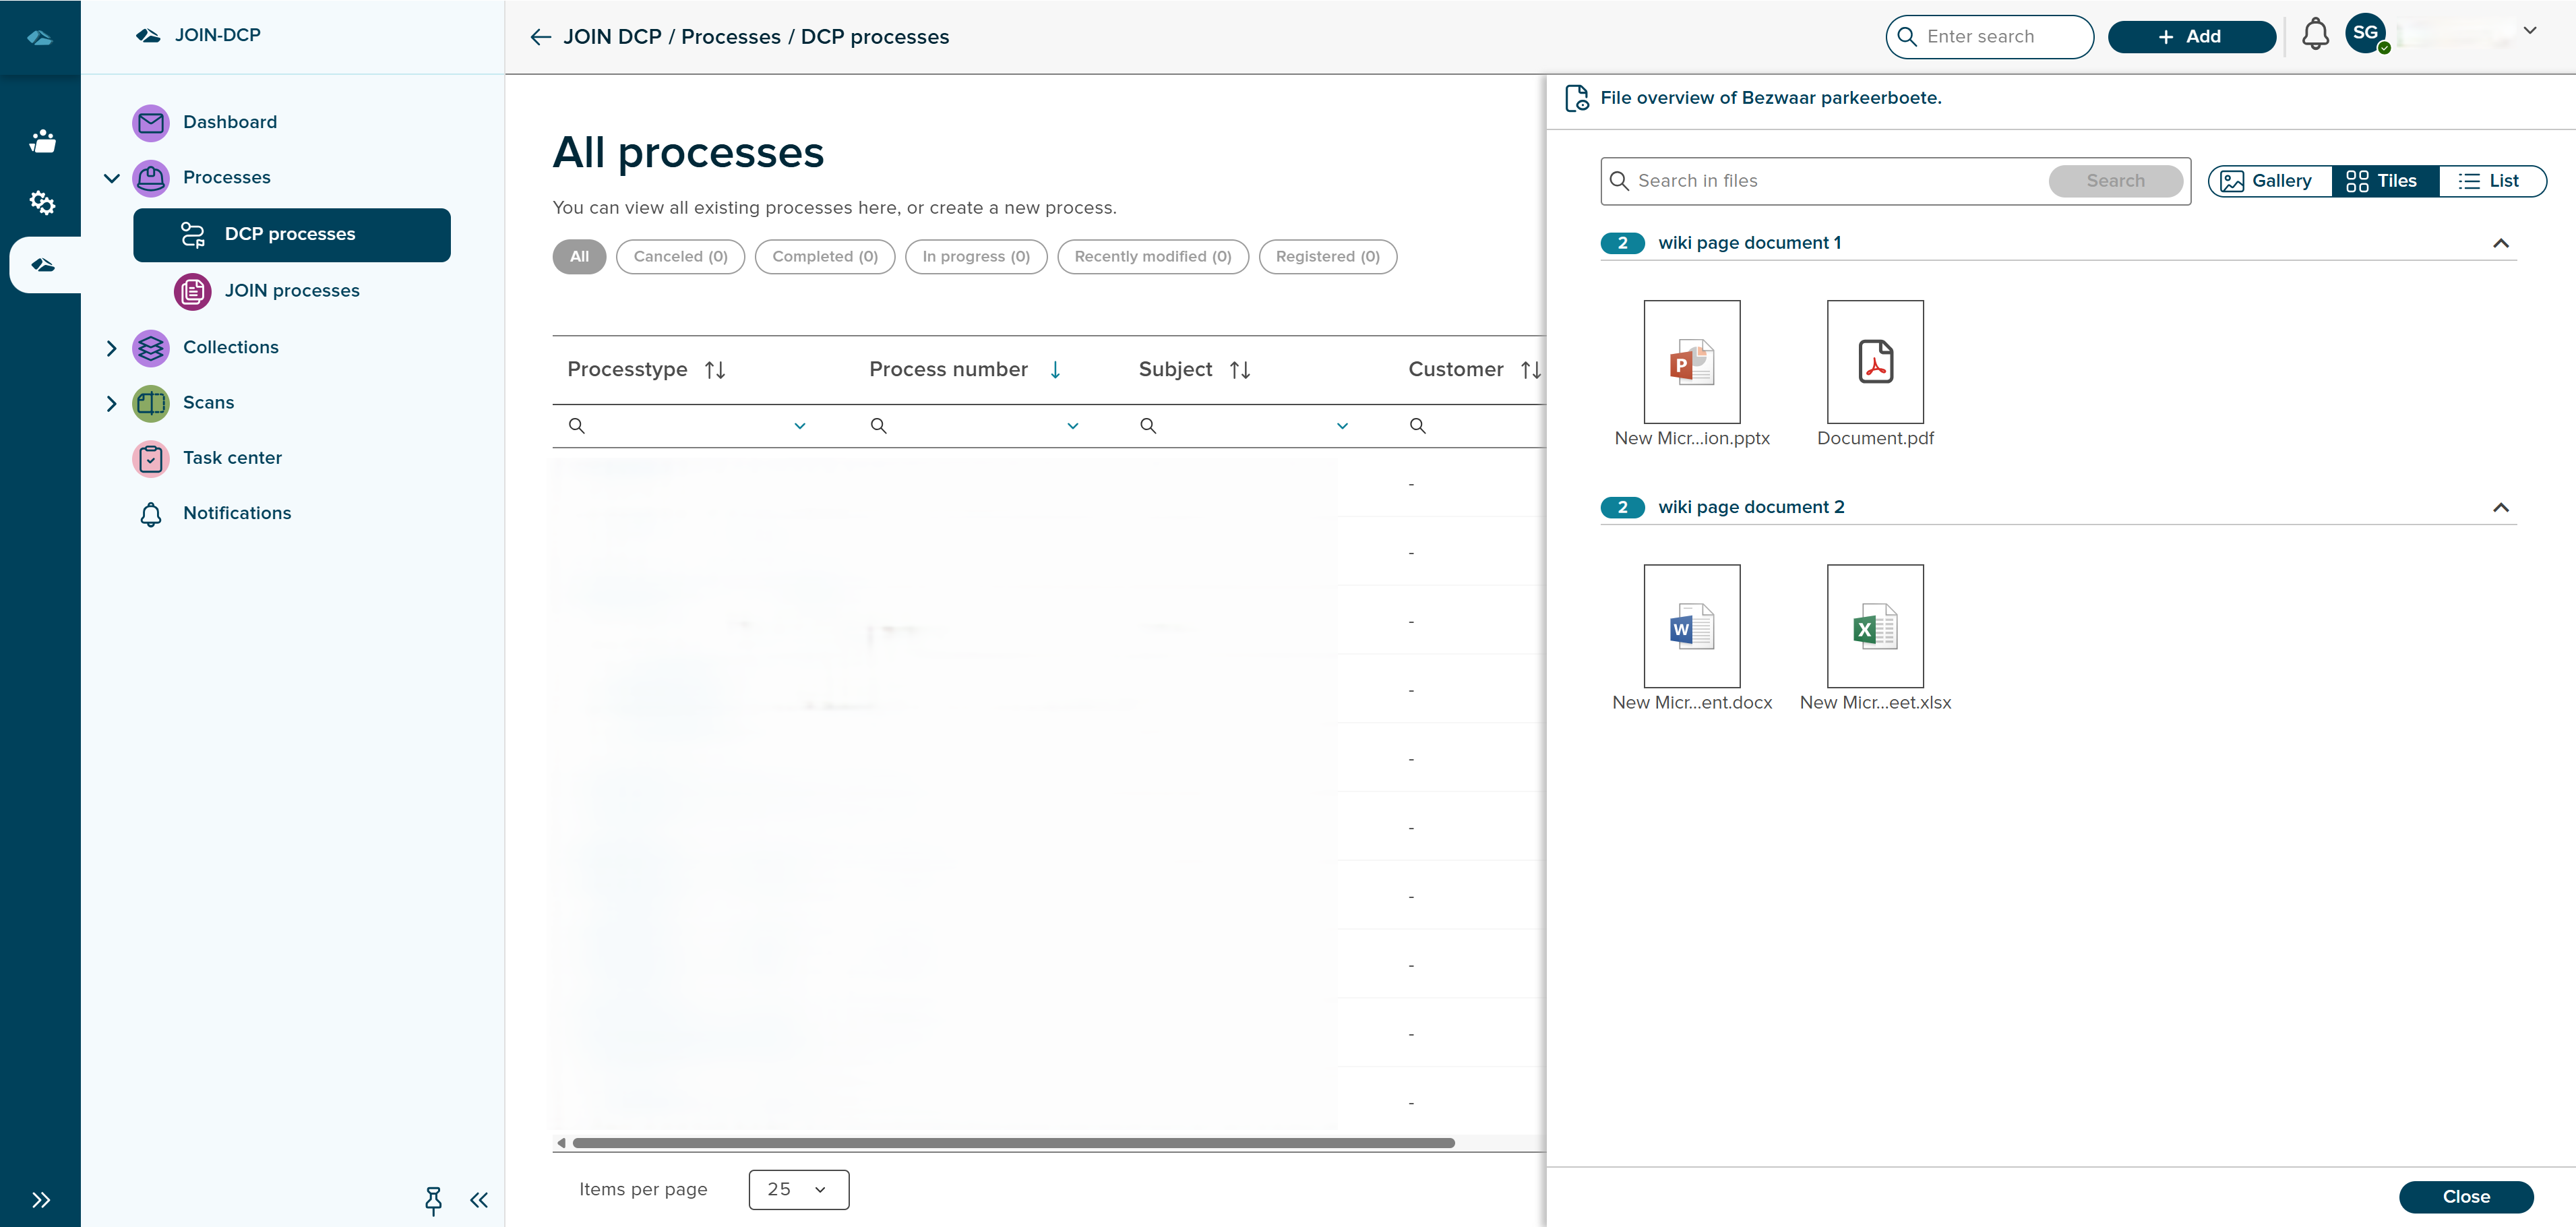
In Tiles view, user can see the files in different sections based on the document in tiles.
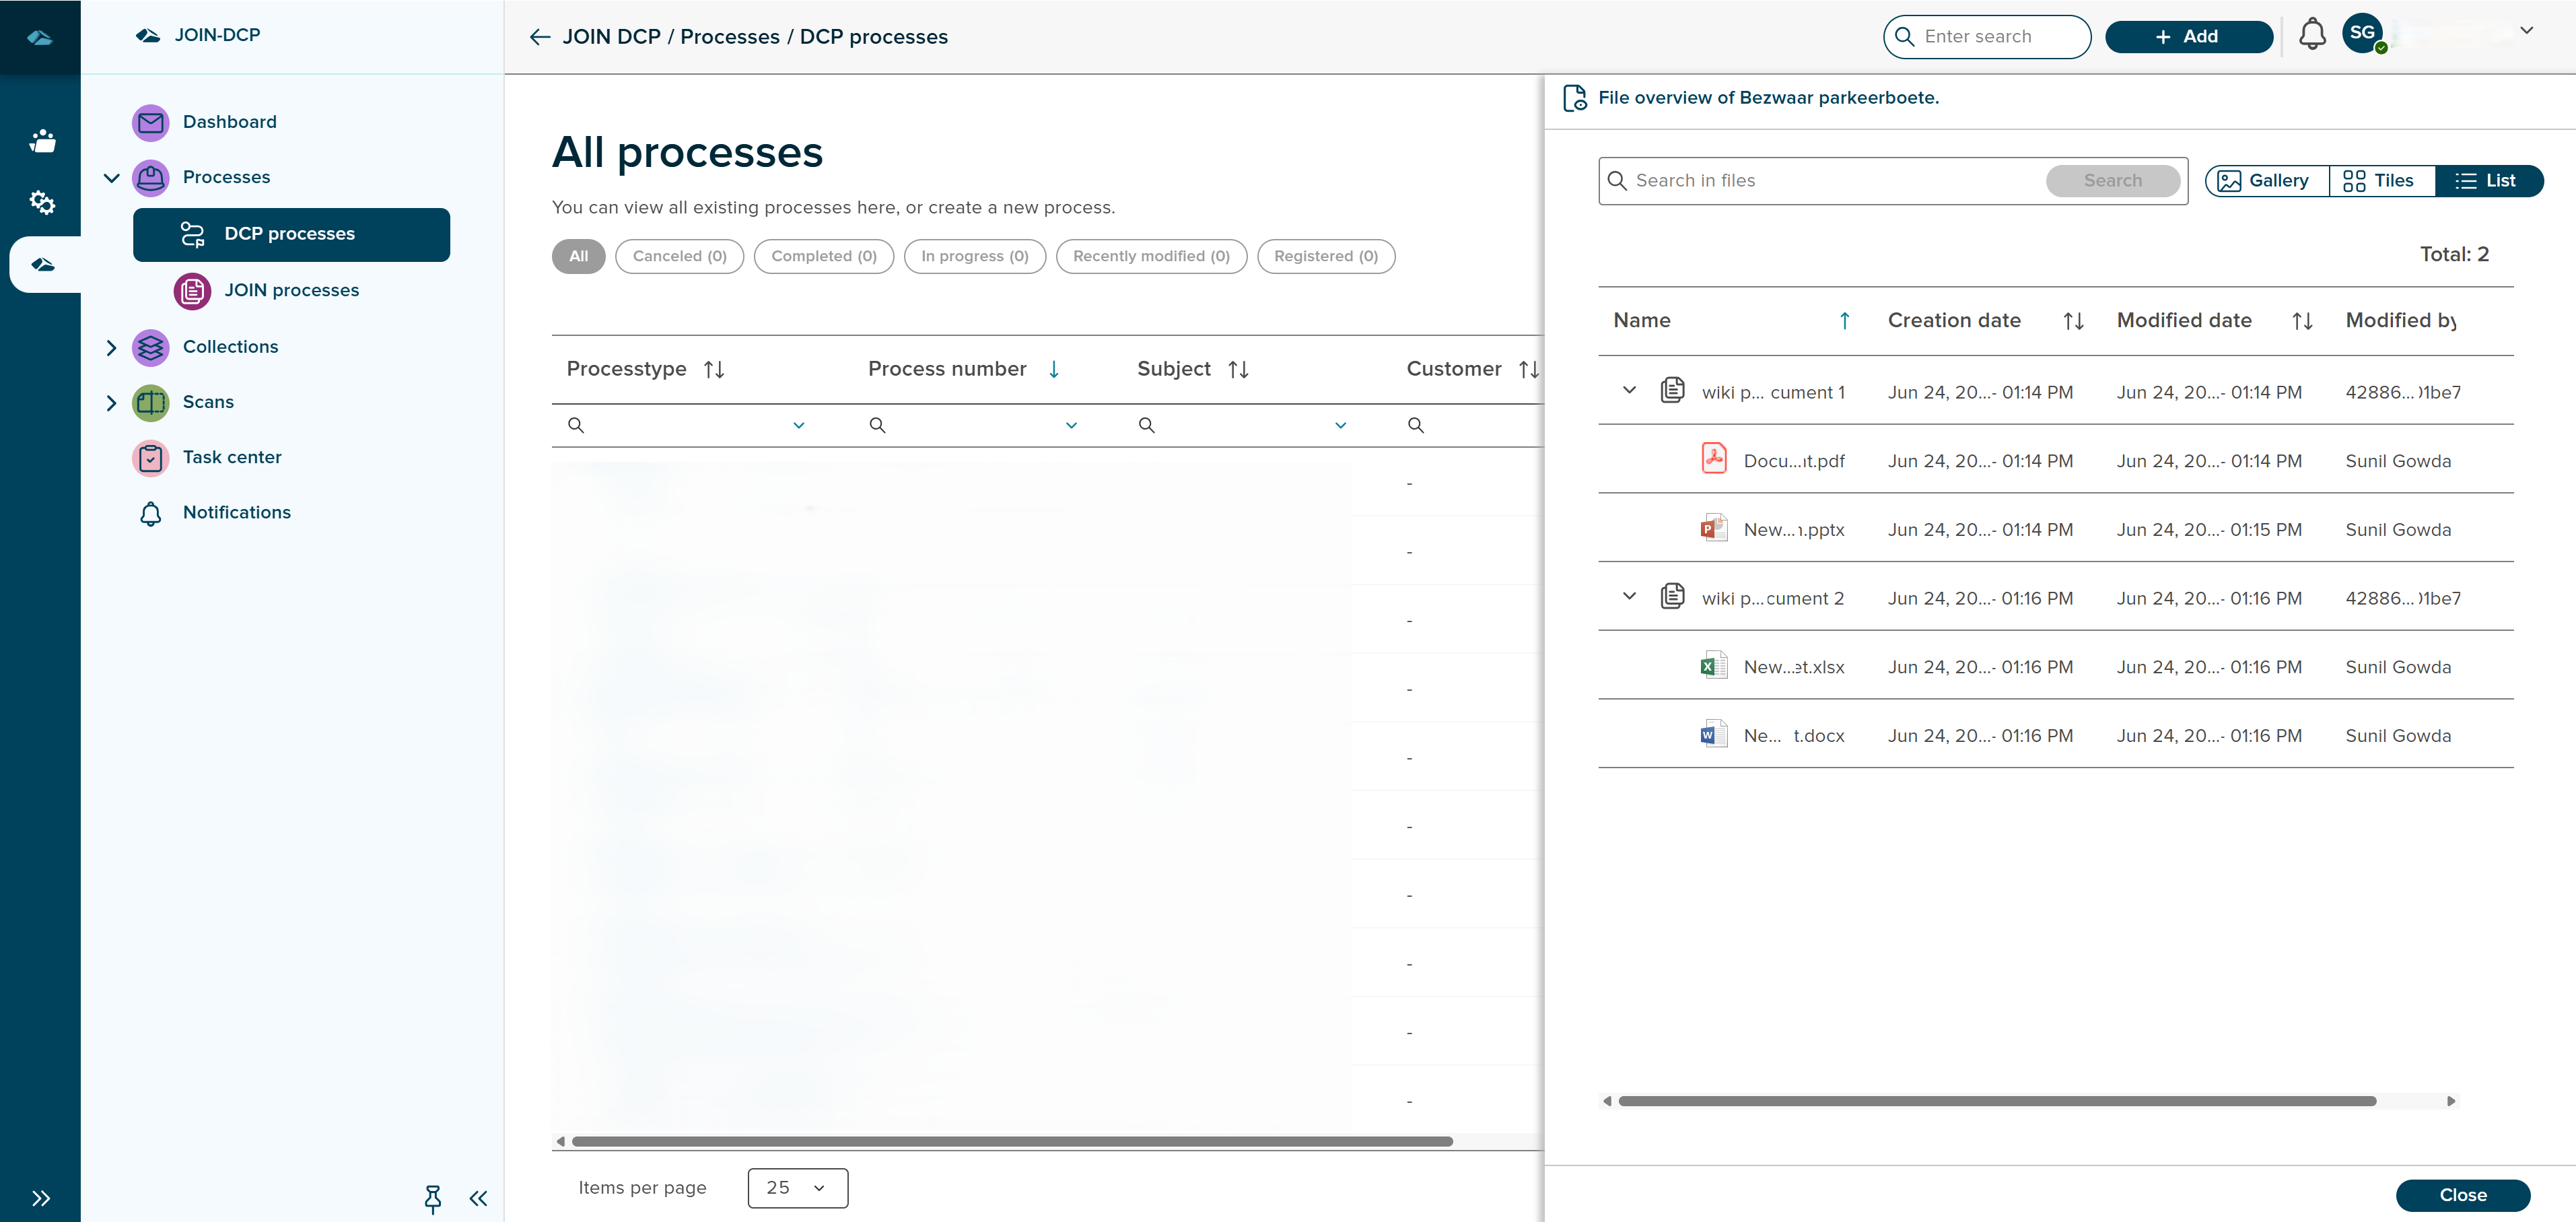
In List view, user can see the files in lists, will shows details of file creation, modified date and user details.
¶ Overview and Bulk actions
The user can export the Process data in Excel and edit the Process data by clicking on the Actions button in the Process grid.
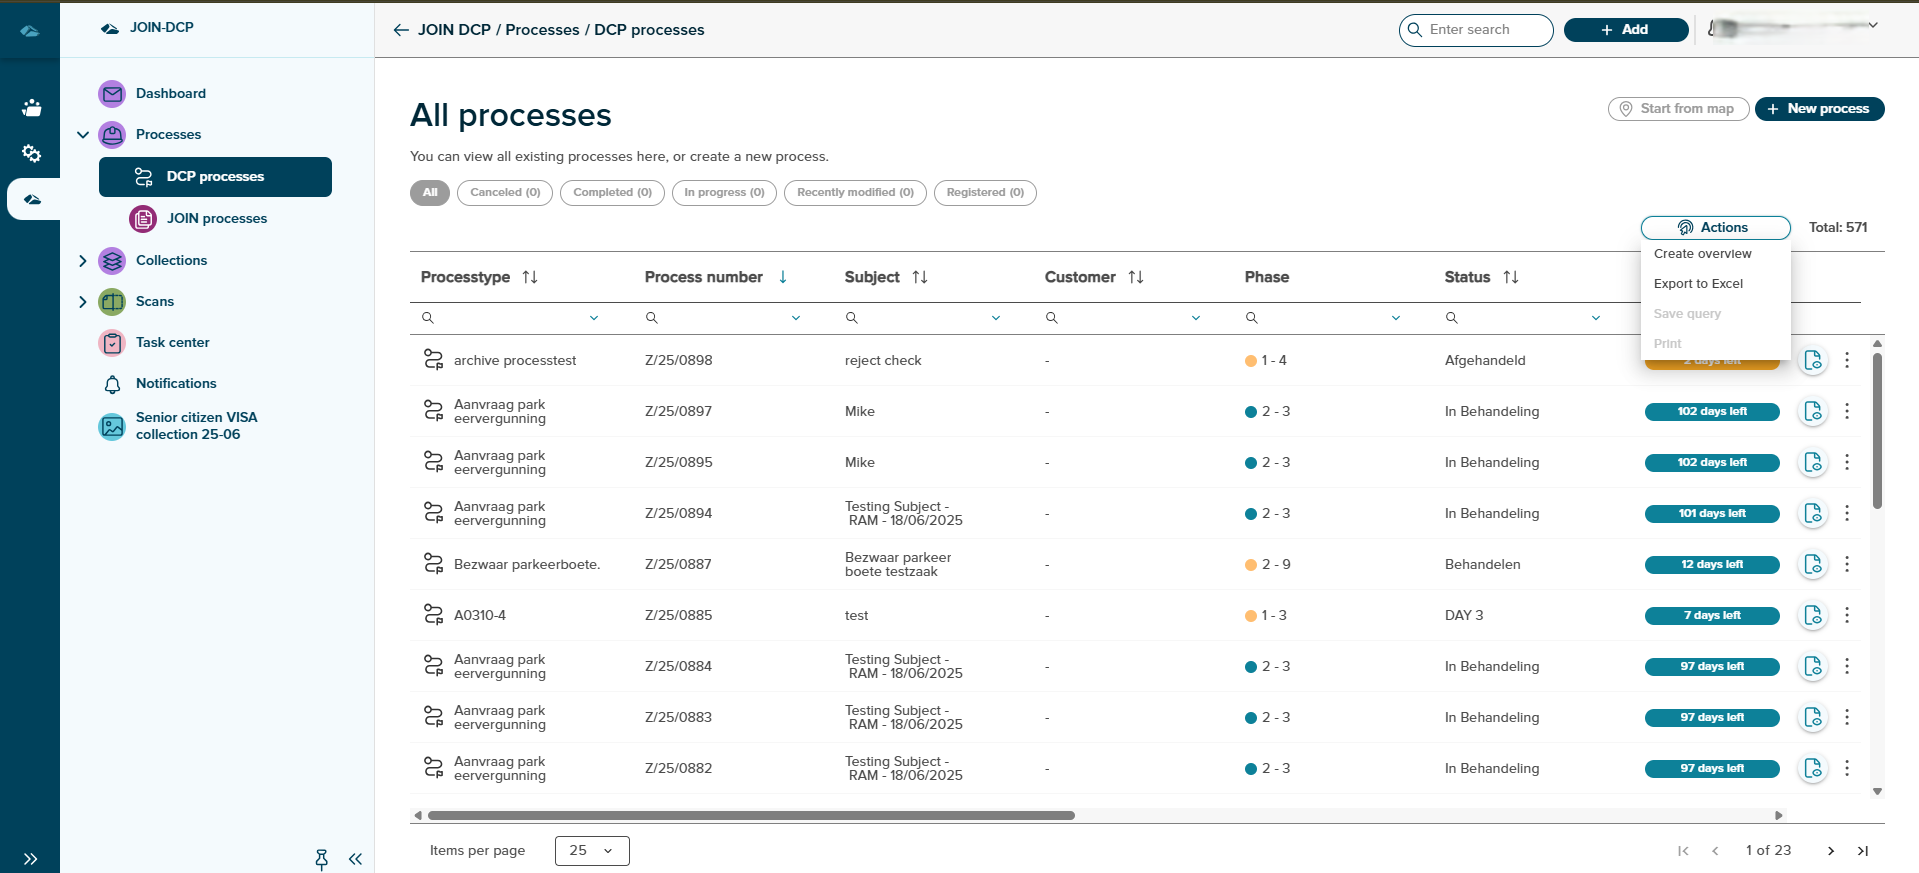
On click on the Actions button, a dropdown will open with 4 options
1)Create overview
2)Export to Excel
3)Save Query
4)Print
On the click of the Create overview option, a new page will open which contains all the created Processes and above the page are two tabs
1)Base
2)Bulk
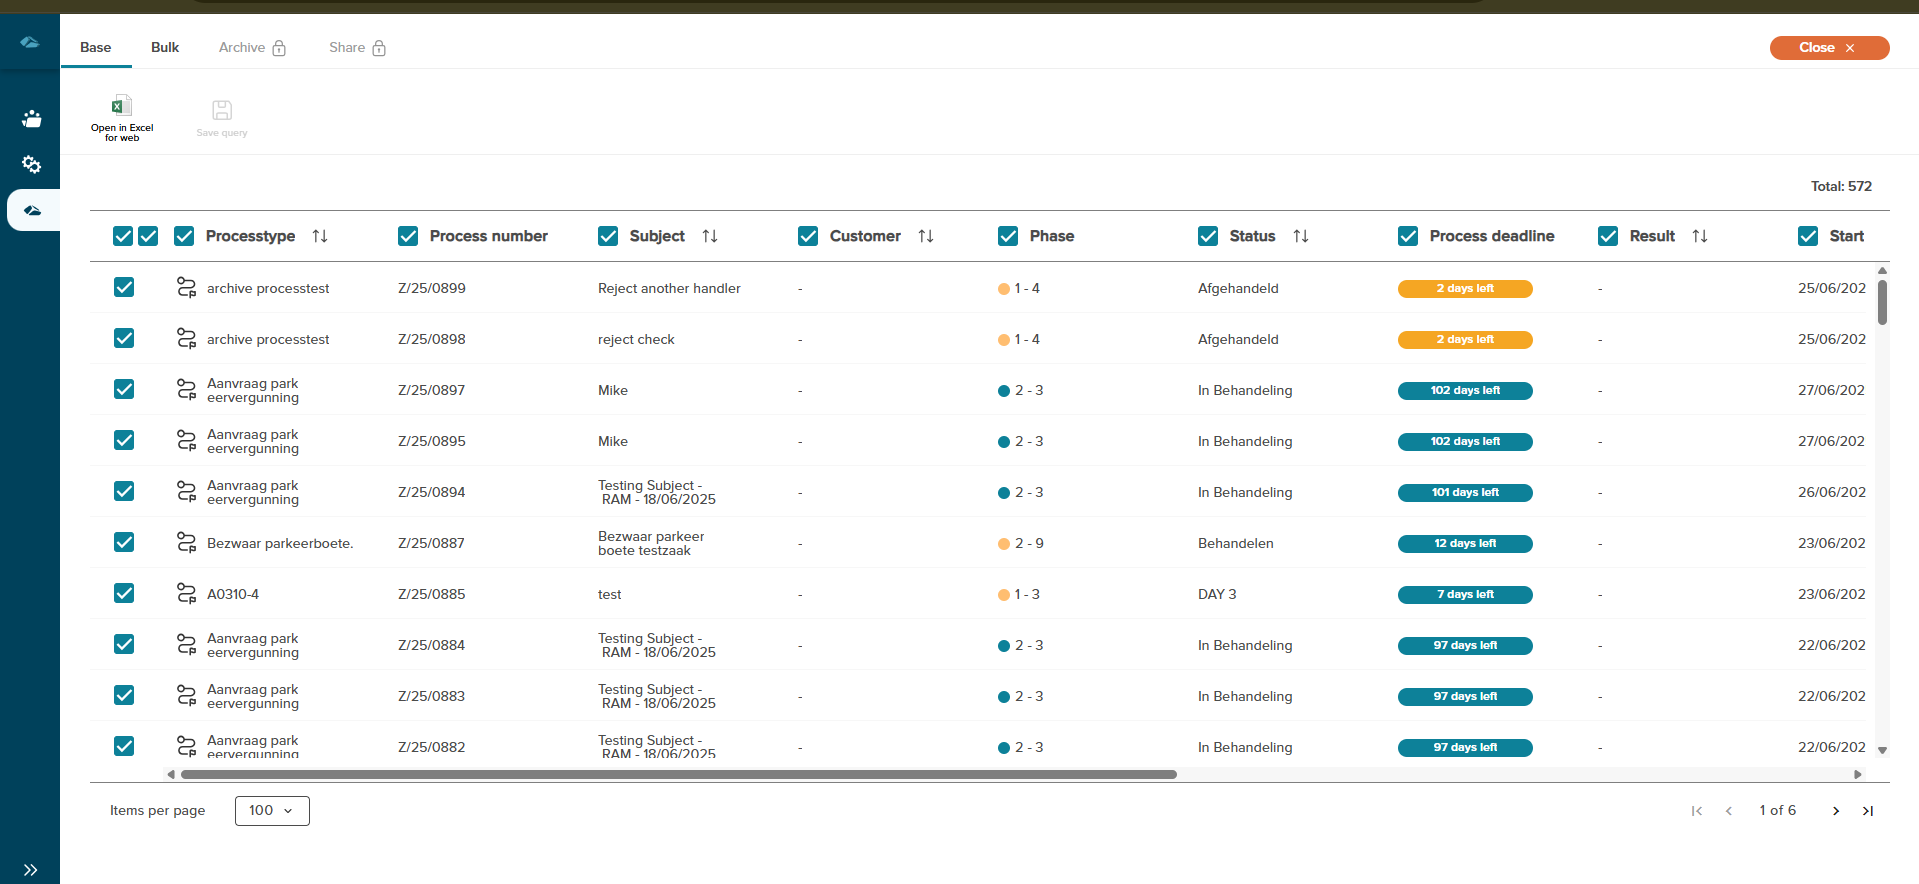
On the Base page, the User can select single or multiple Processes by clicking on the checkboxes. After that, the user has to click on “Open in Excel for Web,” and a side panel will open containing all the fields and common fields of the active phase.
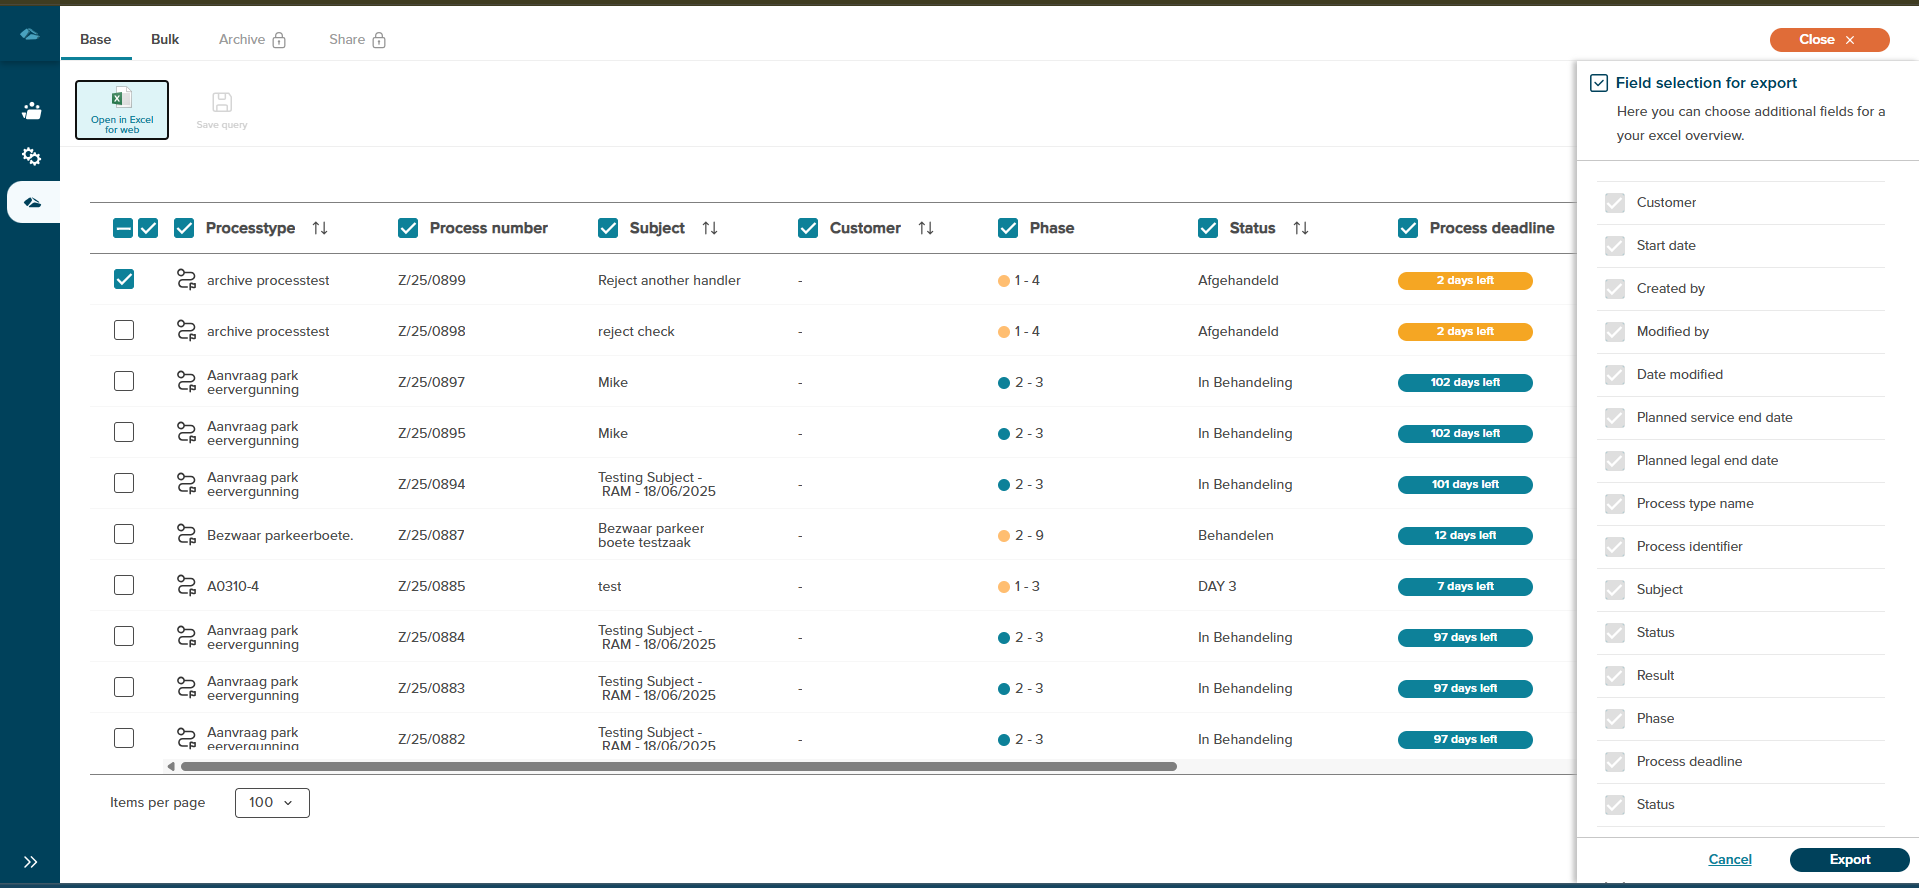
The user can click on the “Export” button in the side panel to export the data in an Excel sheet and after clicking on the export button , the excel sheet will download.
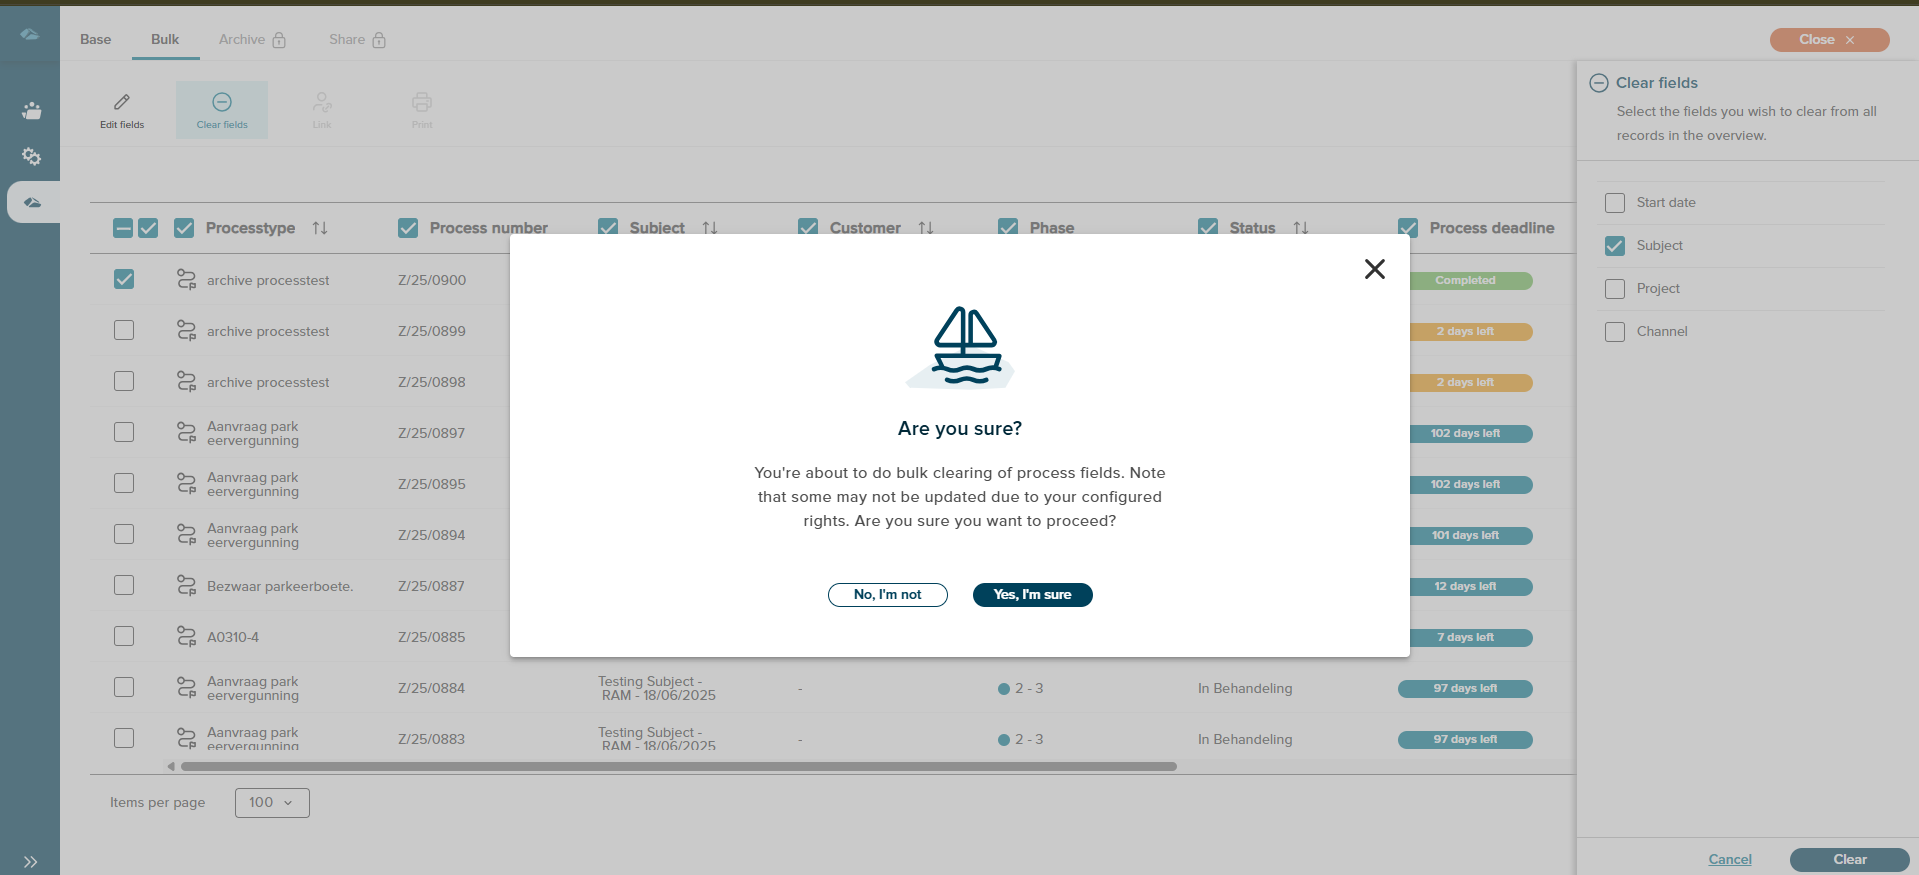
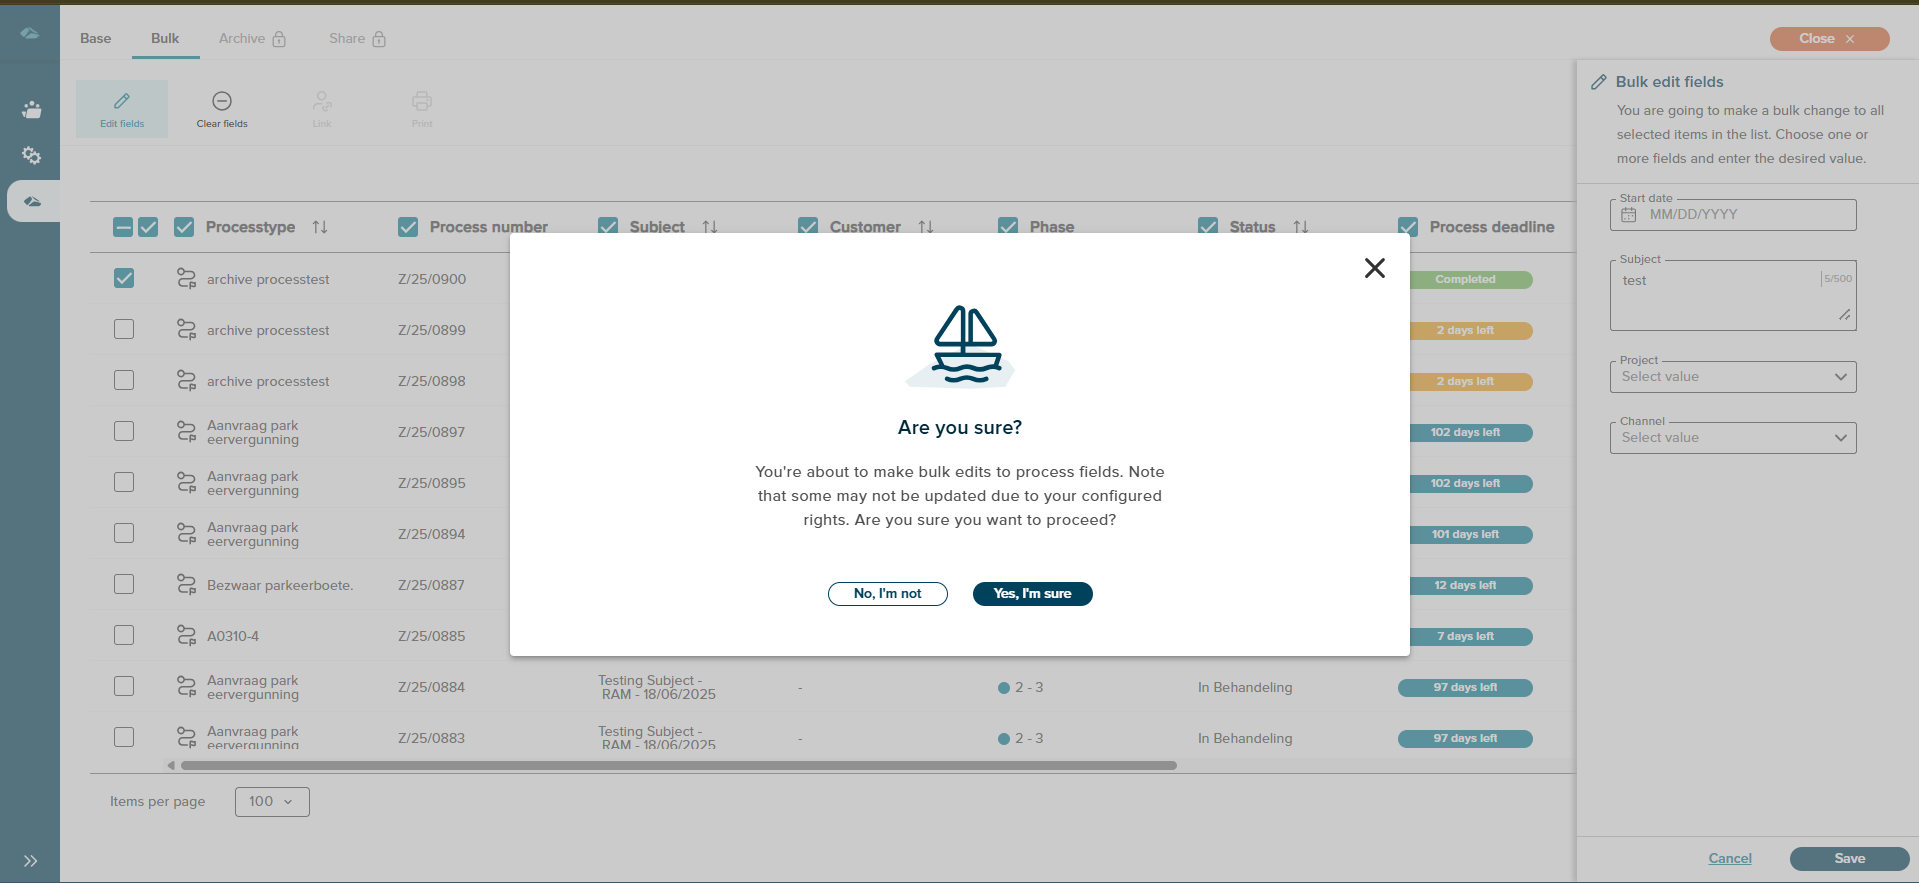
On the Bulk page, the User can select single or multiple Processes by clicking on the checkboxes. After that, the user can “Edit fields” or “Clear fields”.
When the user clicks on the “Edit fields” option, a side panel will open containing the editable fields. When the user edits the fields and clicks on the save option, a popup confirmation message will appear on the screen with the “No,I’m not” and “Yes,I’m sure” options.
And when the ,user clicks, on the “Clear fields” option then a side panel will open and which contains the fields and user have to select which fields data have to clear and after selecting the fields user can click on the “Clear” or “Cancel” option.And if user select the “Clear” option then a popup confimation message will appear on the screen with “No,I’m not” .