¶ New case type
You can create a completely new case type with the following steps:
- Click on New case type at the top left of the screen

- Go through the 5 steps to configure a case type - General, Statuses, Results, Authorizations and Confirm

¶ General
The following items are defined in the General step:
- Properties - General properties of the case type, such as the Name, Duration and Person Responsible
- Extensive properties - Specific properties that mainly have to do with the ZTC 2.1 information model, archive data, but also the sharing of this case type
- Characteristics - Extra characteristics that one wants to add to the metadata profile of cases of this case type, including address relationships
- Decisions - Decision types related to this case type
- Documents - Document types that one wants to be able to record in cases of this case type
- Case objects - Objects related to this case type (not used in combination with JOIN Case)
- Roles - Roles related to this case type (not used in conjunction with JOIN Case)
- Case type relationships - Relationships between different case types, such as follow-up and sub-cases of other case types
Depending on the modules you have / have not purchased, more menus are available:
- External applications - configure the links based on the StUF-ZKN protocols
- Competent authority - If you work with several organizations in the same business system, you configure this with the help of competent authority
- Partners - if you work with multiple organizations on the same case (chain collaboration), you can configure the partners with whom you want to share the case type here
- E-forms - if you use web forms for automated intake in the case system, you can configure the properties of the web form per case type here

¶ Statuses
The status model is determined for this case type in the Statuses step. The status model consists of at least two statuses, namely a start and an end point. By default, the statuses Received and Completed are offered here, these can be changed. JOIN Case Types uses a linear status model where the first status is reached immediately at the start of a case. Treatment takes place between all statuses. So two statuses means one action, three statuses means two actions. The status records which action is required to achieve this.
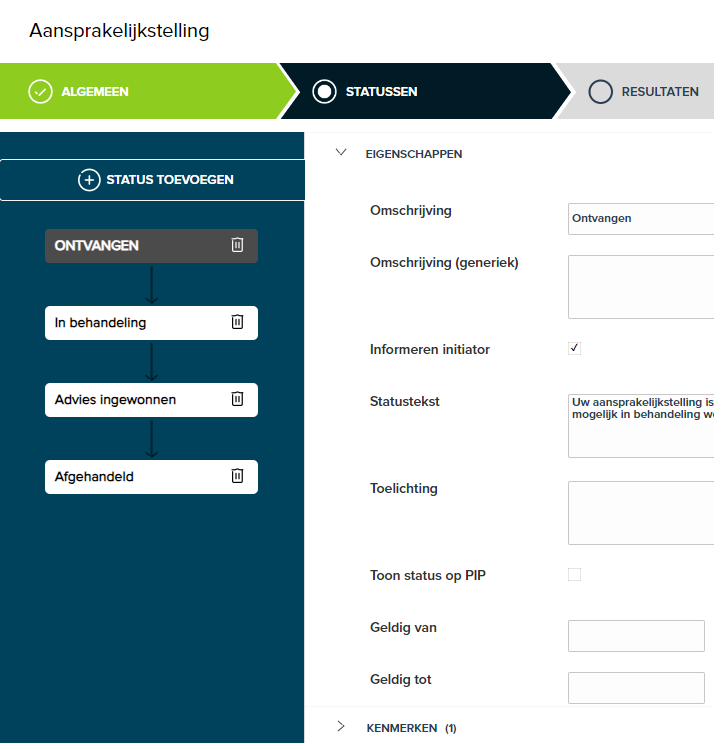
In the Status section, you can see the configured status model on the left. You can click on a status to configure it. This status will then be colored dark blue, as Received in the image above.
¶ First status
The first status does not contain any information about the treatment, as it is reached automatically at the start of a case. No action is required for this. The following statuses will all ask for treatment data. Enter at least the following information:
- Description - The designation for this status. This will also be shown in the case system. Think of possible publication to an external party.
- Characteristics - In the Characteristics section you can indicate which specific case characteristics should be mandatory from the moment a case is registered.

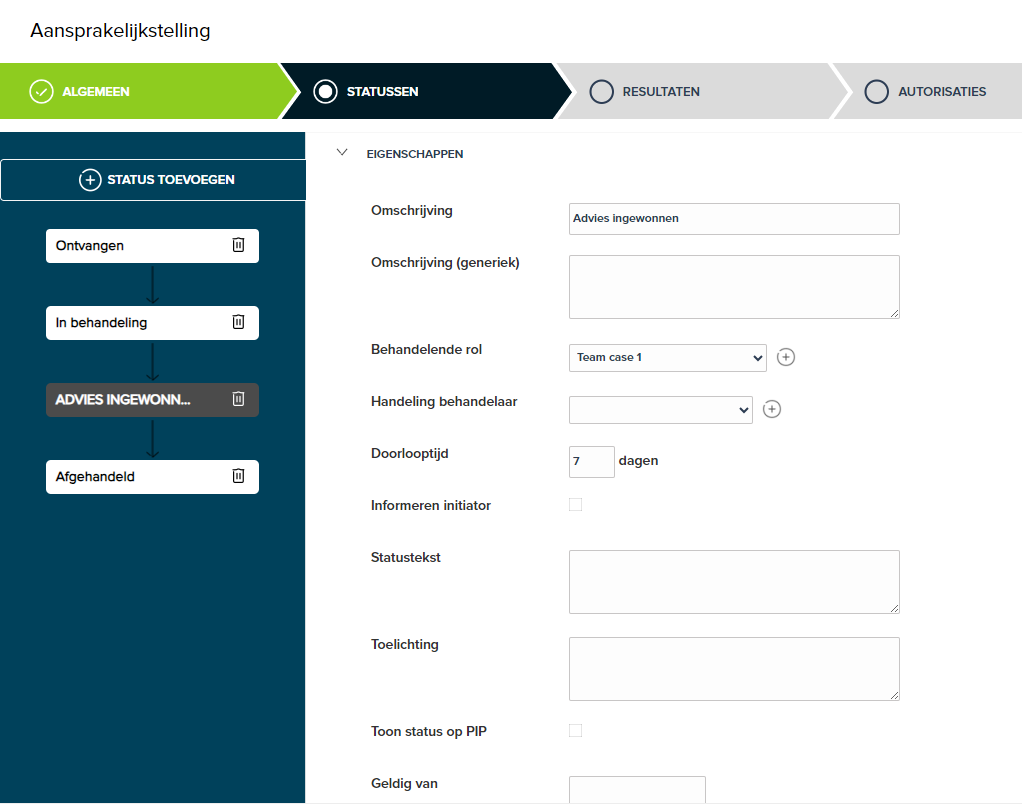
¶ Follow up status
Each subsequent status will demand the treatment necessary to achieve it. So what is actually recorded here is what happens between the previous status and this one. Enter at least the following information:
- Description - The designation for this status. This will also be shown in the case system. Think of possible publication to an external party.
- Handling Role - Choose the role that the action must perform to reach this status. If left empty, an Assign to field will appear in the case system. This is mandatory when registering a case. This allows the case type to be flexibly assigned to various roles, depending on the case. If this field is left blank in a state beyond the second, the action will be assigned by default to the role or user who completed the previous action.
- Treatment provider - What action do you ask the user? This is shown in the Worklist.
- Turnaround time - The number of calendar days within which the action must be completed. If left empty, this is 0 days and therefore too late immediately.
- Reject role - since the release of July 16, 2018, it is possible to select a reject role (only) in the 2nd status. When dealing with the case, the case can be rejected and returned to this role. The field “send rejected case” is only available in the 2nd status!
- Checklist - In the Checklist section you can indicate control questions that are asked of the practitioner. Audit questions can be mandatory or optional. In the case system a checklist will appear with these control questions to which the practitioner answers YES or NO. Mandatory means that the control question must be answered with YES in order to reach the status.

- Characteristics - In the Characteristics section you can indicate which specific case characteristics must be required to be allowed to achieve this status.
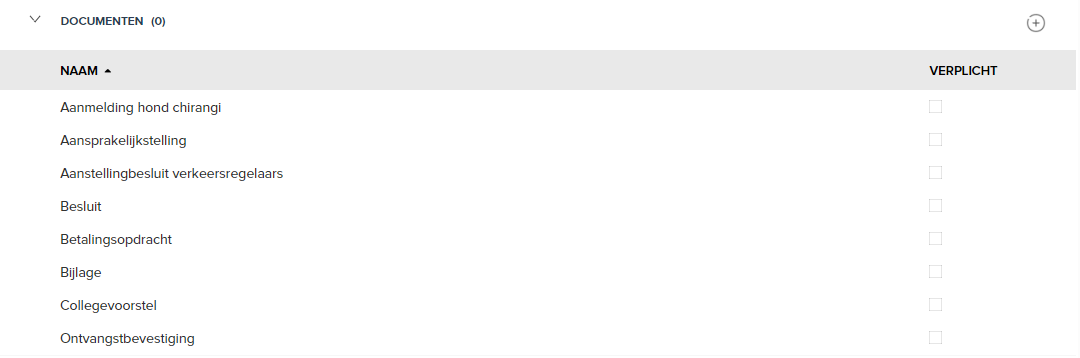
- Documents - In the Documents section you can indicate which specific documents must be recorded in the case in order to achieve this status.
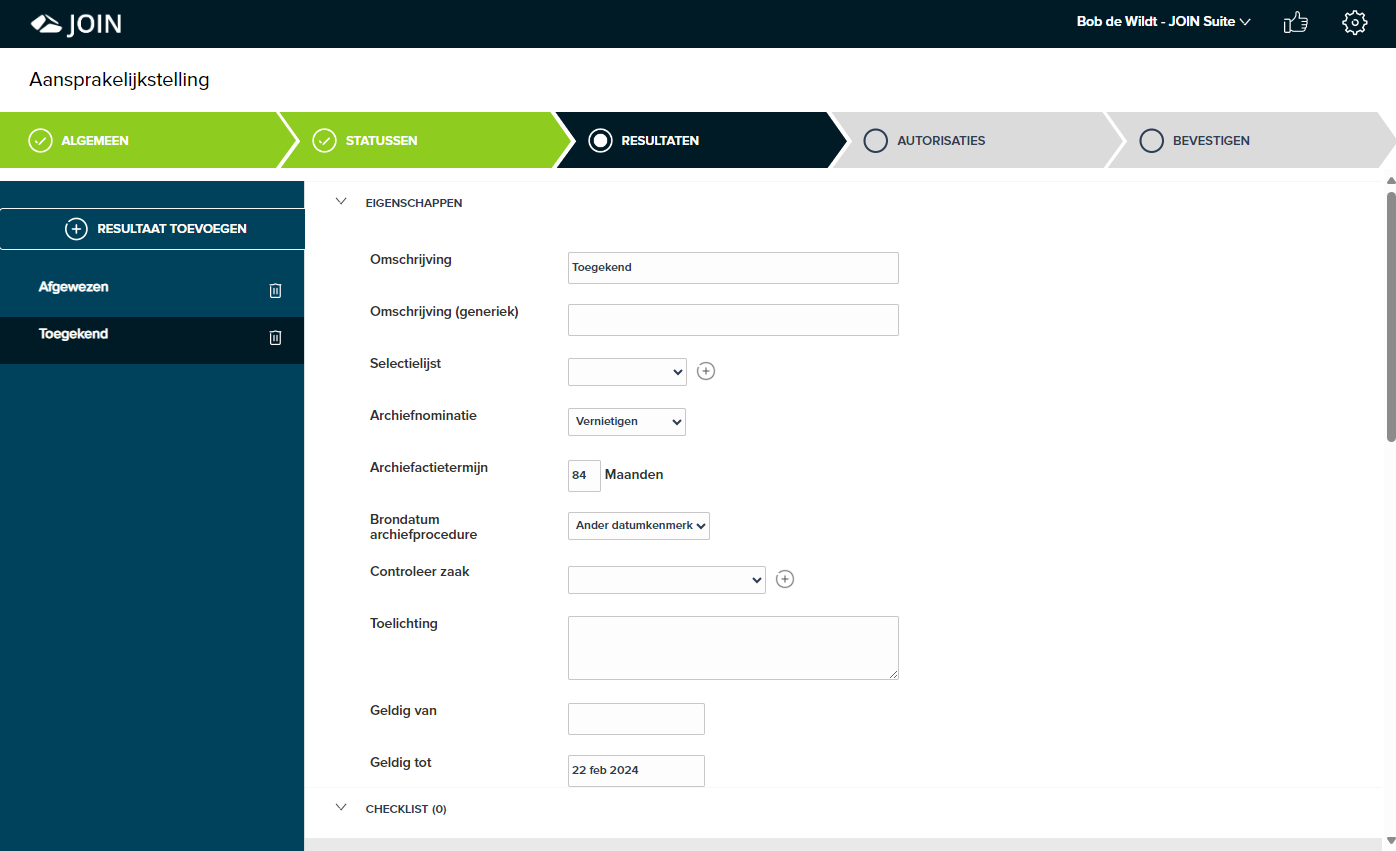
¶ Results
In the Results step, all possible end results of cases of this case type are recorded. These results drive the archiving process in the case system. In addition, obligations and consequences can also be assigned to results, such as mandatory characteristics, documents and follow-up cases. The practitioner of the last status is asked to indicate what result has been achieved. At least the following data is recorded for each result:
- Description - The name for this result. This will also be shown in the case system. Think of possible publication to an external party.
- Archive nomination - Can the case be destroyed or kept ‘forever’?
- Archive action period - After how many years the case must be destroyed in case of an archive nomination Destroy. Or after how many years should the case be transferred to another archival body with an archival nomination of Bewaren.
- Source date of the archive procedure - From which date should the Archive action period start? By default, this is the date on which the case was Handled. In addition, you can choose an extra feature that has been added to Attributes (if this has the format Date). You can also choose a Different date reference if you want to manually enter a date for each case. This is the case, for example, with Expired interest. This cannot be directly assessed when handling or archiving a case. The Effective Date and Expiry Date Decision are also an option. In doing so, use must be made of the recording of Decisions for this case type.
- Review case - the handling role selected in the drop-down list (for example, DIV) gets the case in its work queue after handling. This makes it possible to determine per result and per case type whether an additional file check must be carried out after completion. Because the control activity is only started after processing, this has no consequences for the total processing time of the case (the handling phase).
As with Statuses, obligations in the field of Features and Documents can be used. A Checklist can also be provided. It means that these obligations must be fulfilled to achieve this result. If these are not met, one will again be asked what result has been achieved. See the Statuses section for more information on these components.
¶ decide
This part has yet to be described:
-
object decision and attributes
-
link decision to case type
-
link decision to result type
-
decisions and archive characteristics / source date of the archive procedure
¶ Authorizations
In the Authorizations step, access to cases of this case type is configured. Which groups of users in the case system have access to cases of this case type and at what level? The following levels of authorization can be distinguished:
- No access - This group of users should not see cases of this case type at all.
- Consultation - This group of users may only consult matters of this case type, but cannot make changes or add documents to them.
- Edit - This group of users may edit cases of this case type, this applies to case data as well as adding and editing documents in these cases.
- Add - This group of users may add cases of this case type. Starting new business.
- Delete - This group of users may delete cases of this case type.
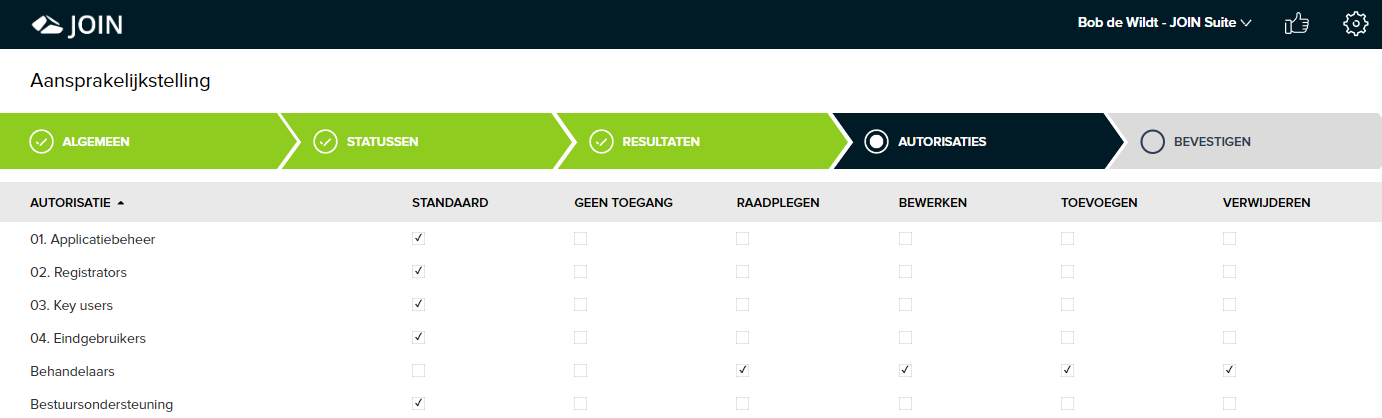
The authorization levels have a constructive effect, which means that Delete means that all subordinate levels are also available, such as Add, Edit and Consult. In practice, the Default setting will usually be equal to No access. This depends on the configuration of the case system.
The groups of users are named in the central table Authorizations. In the case system the specific users are assigned by name.
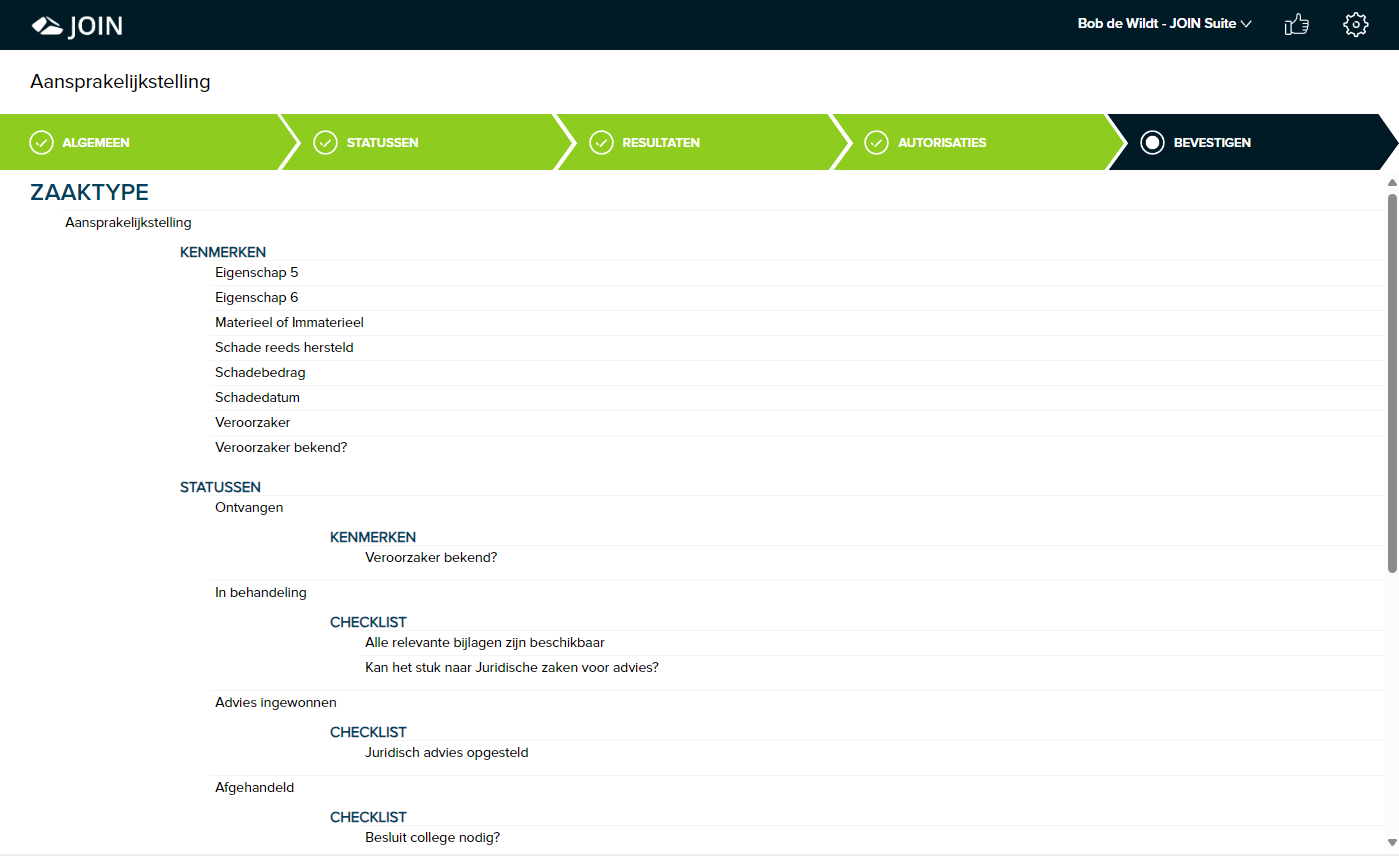
¶ Confirm
In the Confirm step, an overview of the case type is displayed. This is to control the Publishing of this case type to the case system.
Copy case type
If you want to create a new case type based on an existing case type in your list, you can use the functionality of copying a case type. You can create a copied case type with the following steps:
- Click on the white arrow to the right of New case type, now a menu will expand
- Choose Copy case type

- Search the list for the case type that is the basis for the new case type
- Select the case type that will serve as the basis for the new case type
- A new case type will be opened with the basic case type with (COPY) as Description
- You can now make the changes required for the new case type