¶ JOIN Now - First steps
JOIN Now is a clear application where the actions and screen layout are always the same. This way you will always find the menu on the left and you always register a document in the same way. The registration screens and search functions have been aligned with JOIN Case & Document.
¶ Log into the application
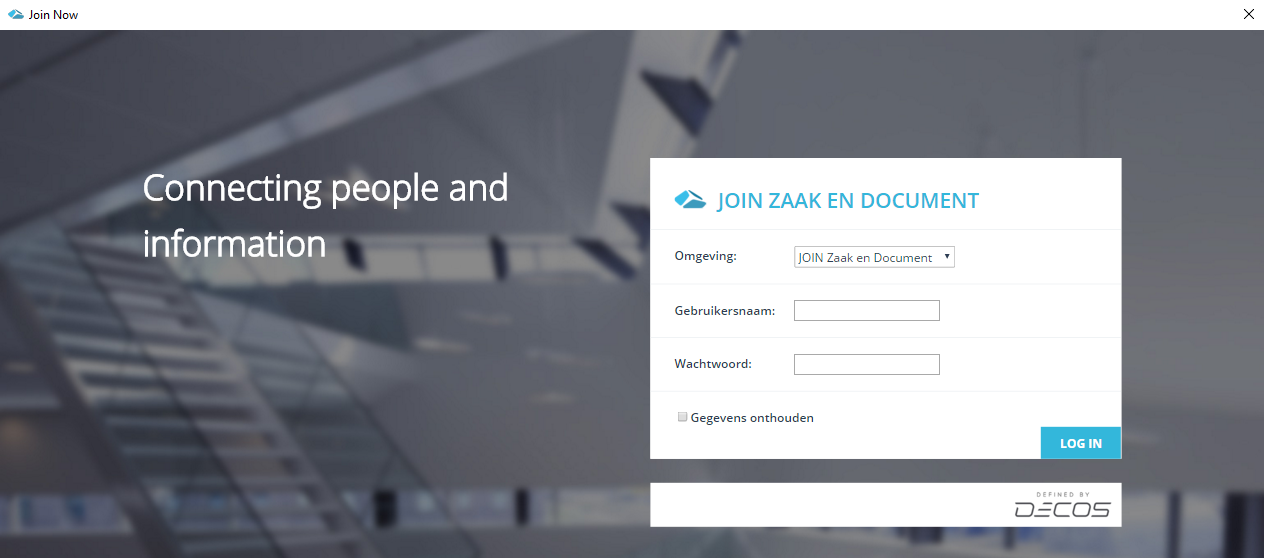
If your organization uses Single Sign On, you will be automatically logged in to JOIN Now, provided you are logged in to the workstation. If you do not work with single sign on, you will see a login screen where you can enter your JOIN username and password.
¶ Personal settings
At the top right of the screen you will find the icon to go to the personal settings. Here you can set whether a mail message should be deleted after it has been saved in JOIN. You will also find the shortcut to this wiki here. But you had already discovered that yourself!
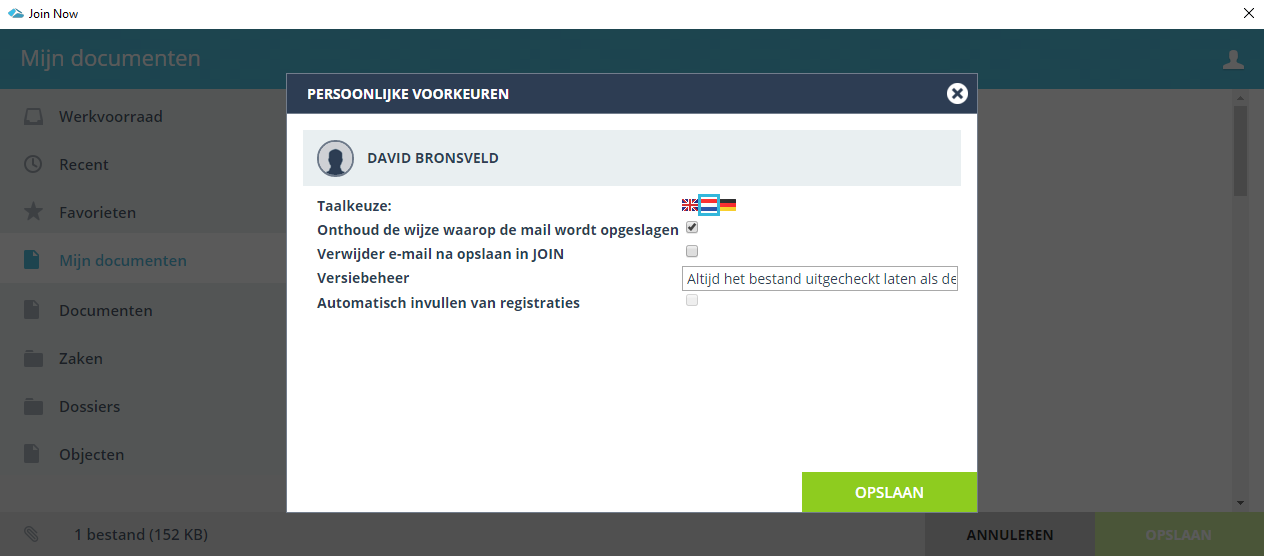
You will find the following settings here:
- Delete the email after registration: as soon as you have registered an email message it will be removed from your mail application (Outlook)
- Remember the way in which the email is saved: if you want to register attachments and email separately, you can indicate this in the “file” section. This setting will remember this for you.
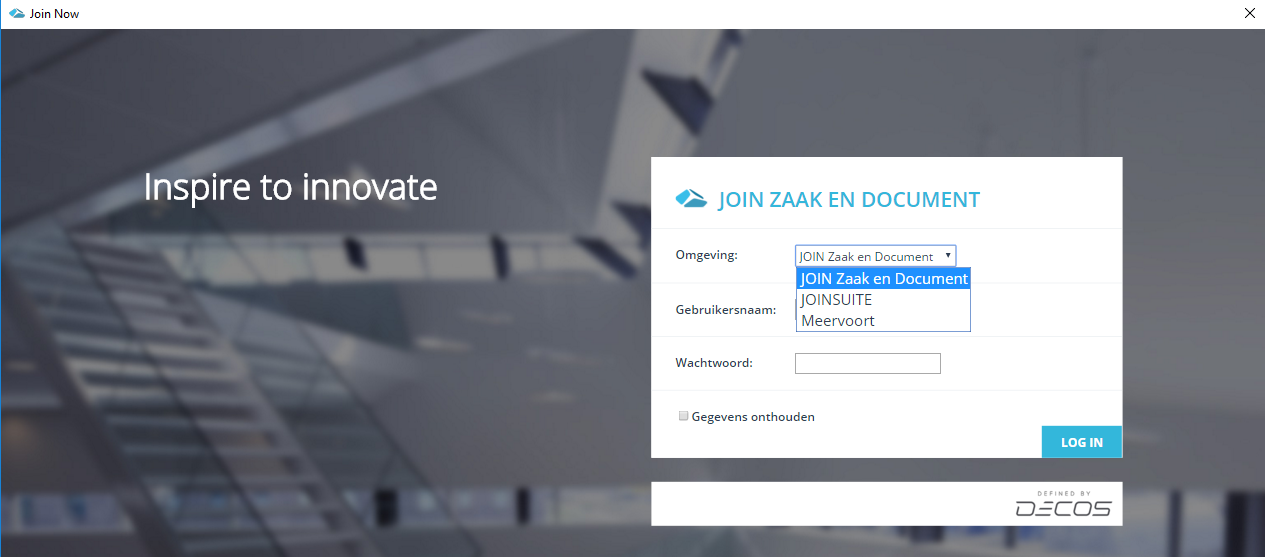
Finally, you can also unsubscribe here. This is useful, for example, if you want to log in under a different username or if you want to switch between your test and production environment as an administrator. Most users only have 1 environment, this option is not displayed there (see image below).
¶ The layout of the screen
the JOIN Now screen is clearly structured:
- On the left you will find the menu. This is explained in more detail below
- On the right, we show the content. This can be a list of collections, the content of a collection or a registration
- At the bottom left we show the number of files you have selected. Here you can indicate exactly what you want to save
- At the top right we show the personal settings and the help function. You have now found the latter.
¶ The menu
The layout of the menu is always the same, but may differ per customer and user due to configuration or rights. The following items are distinguished in the menu:

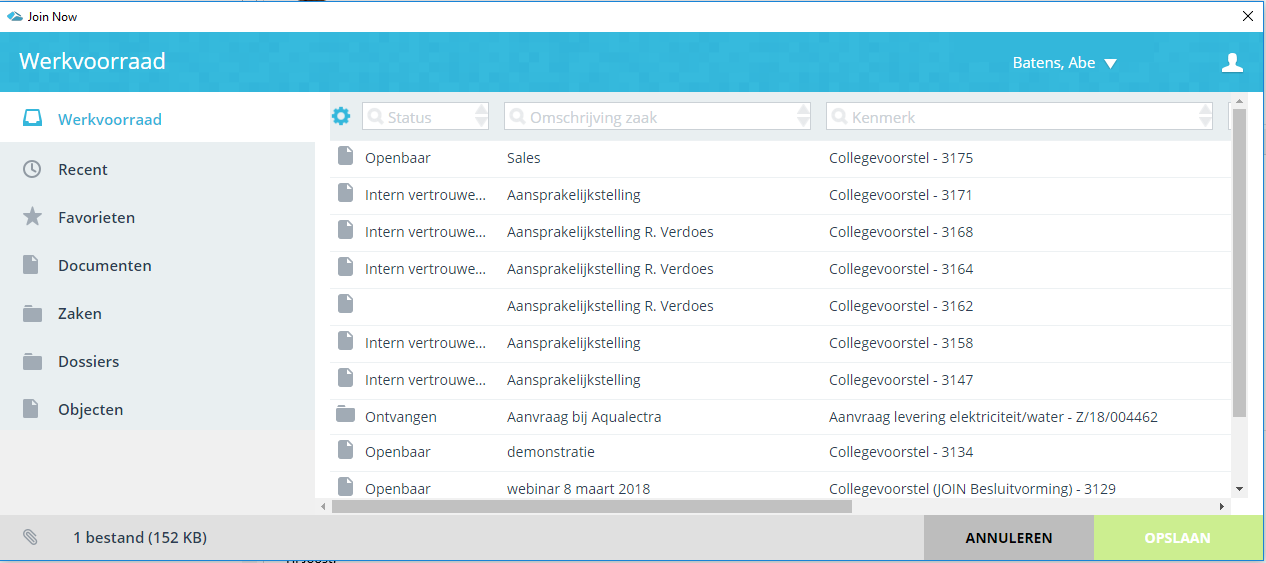
¶ The work stock
The worklist shows all actions that you or your groups (roles) have active in JOIN Case & Document. In this way you can easily add your file (eg mail or attachment) to a document you are currently working on or add the file to a case (new document in the case). At the top right of the screen you can switch work queues (for example if you want to work from your team’s work queue).
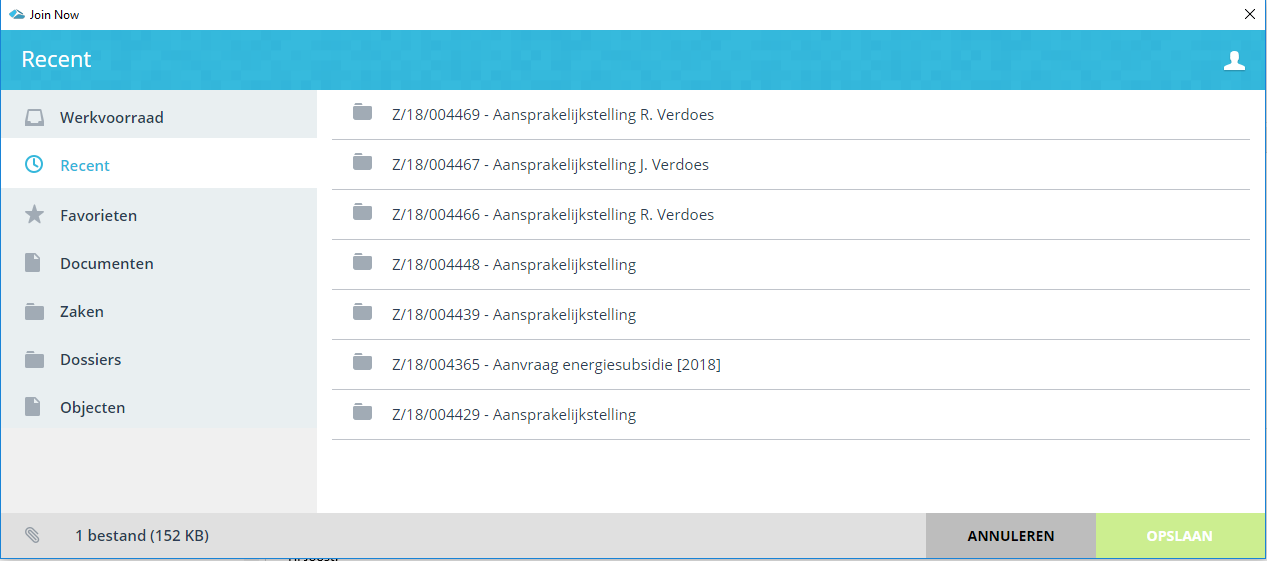
Recent
In the recent menu we show the document collections and files to which you have recently added information. Of course we show the last used first (at the top of the list). In summary, you can use the recent menu in the following way:
- the document book where you recently added a document or added a file to an existing document.
- the file (or case) to which you recently added a document or added a file to an existing document.
Tip: You can also create a document directly from the recent list. You do this by clicking on the blue icon with the +. Saves you an extra click:
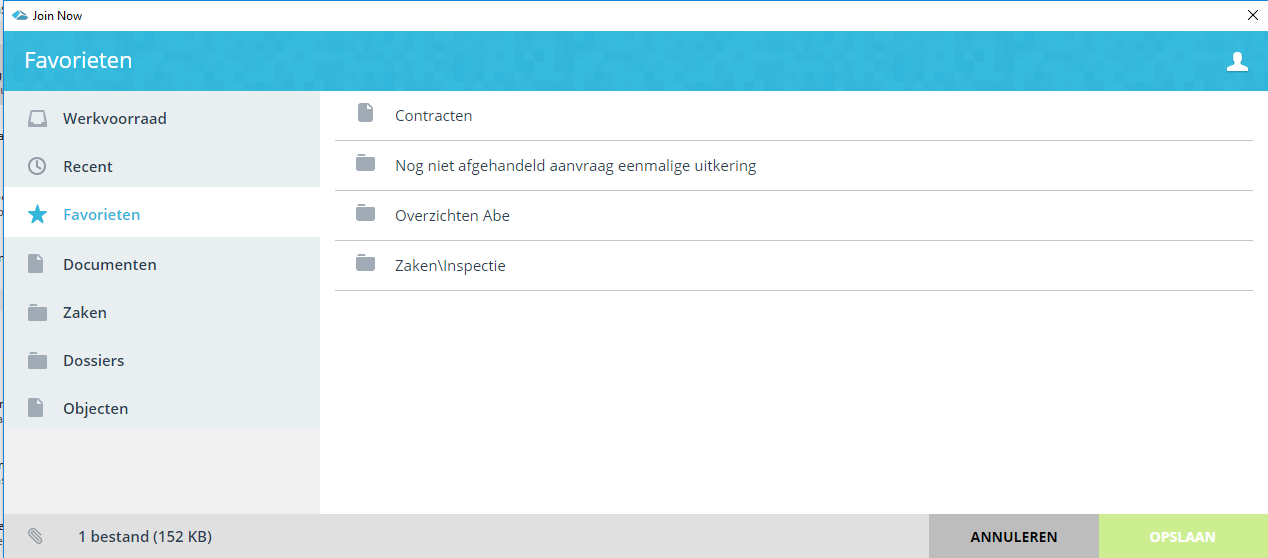
¶ Favorites
Have you created favorites of file or document collections in JOIN Case & Document? Then you can see these favorites here. You can then immediately create a new document registration, link a file to an existing document, etc.
¶ My Documents
If you use personal documents (my documents) in JOIN Business & Document, you will also see these in the JOIN Now menu. You can do the following things here:
- Create a new personal document
- Add a file to an existing document
Here you can:
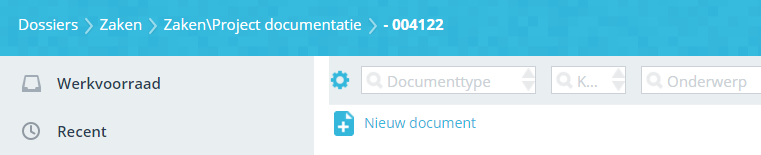
- When you click on the blue document icon with + you create a new document registration. If you see a gray document icon, you have no rights to add a new document. You will enter the registration screen, fill in the data and click on “Save” in the bottom right corner
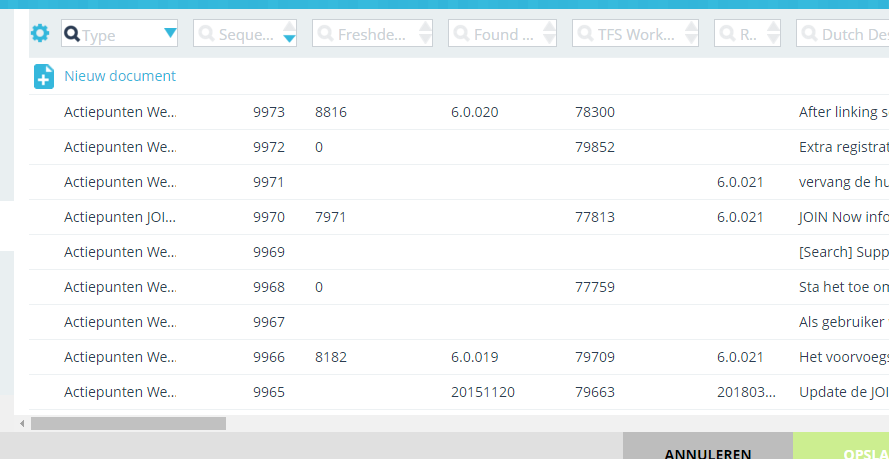
When you click on the name of the document collection, you will be taken to the list of registrations. At the top of the list you can still click on new if you want to add a new registration. If you have found an existing document, click on the line. It is highlighted in gray. At the bottom of the page you can add a file description. When you are done, click on “Save” at the bottom right
¶ Files
New in JOIN Now (and not possible in JOIN Direct) is the possibility to register files (and cases) yourself. You do not have to create the file in JOIN Case & Document first.
You can also do the following in JOIN Now with the files section:
- register a new document with a newly created dossier - register a document with an existing dossier - add a file to an existing document in an existing dossier
When you create a new file, click on the “new” button. You complete the file registration and then click on the green button “next” (bottom right). Then choose the document book where you want to register the document. You complete the document registration and finally click on “save”.
¶ Affairs
If you work in a case-oriented way with JOIN Business & Document (based on JOIN Zaaktypen.nl), the Business section will be shown separately in the menu. Handy, it saves you extra clicks. When you select this section, it works in the same way as the dossiers section (with the exception of the dossier collections list). Here you can:
- Register new cases yourself (if you have sufficient rights) and save the file in a new case document
- Register a new case document in an existing case
- Associate the file with an existing case document in an existing case
When you create a new case, click on the “new” button. You complete the case (don’t forget the case type!) And then click on the green button “next” (bottom right). You complete the case document (do not forget the document type!) And finally click on “save”.

¶ Content
The right part of the screen shows the contents of the menu item, the contents of a collection or a registration screen, respectively. For example, when the documents section is selected, the list of books (collections) is first displayed here. From this screen a registration can be created or you can click through to the content of the book concerned.
¶ Select files
The part files are shown with the following parts:
- Outlook: storing mail (s)
- Outlook: inserting files from JOIN to a new mail
- Network drive: storing 1 or more files from explorer
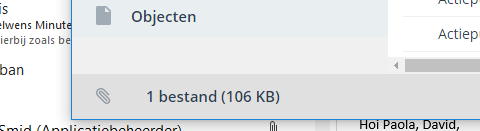
In the above situations, “file” is displayed at the bottom left of the screen. You can click on this. In the screen that opens you can select which files you want to save and insert. This is further explained on other pages of this wiki.
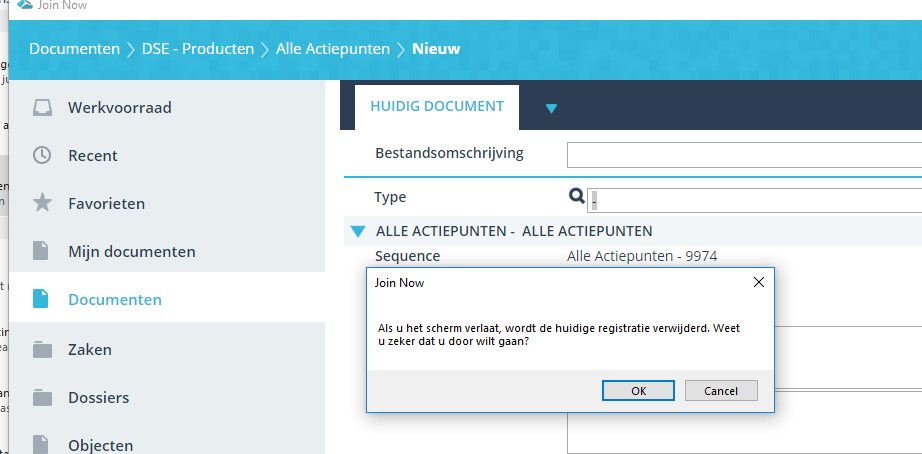
¶ The breadcrumbs and cancel
You can always easily take a step back via the breadcrumb trail. If you are creating a registration and you select an earlier part via the breadcrumb path, you will be asked if you want to leave the registration. Note that this will be undone.
You can cancel your action in 2 other ways:
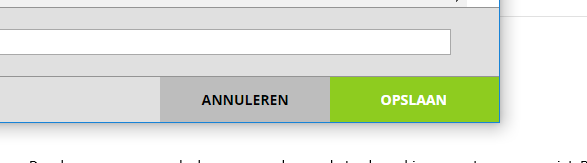
- by clicking on the “cancel” button at the bottom right, your registration will be canceled
- by closing the window.