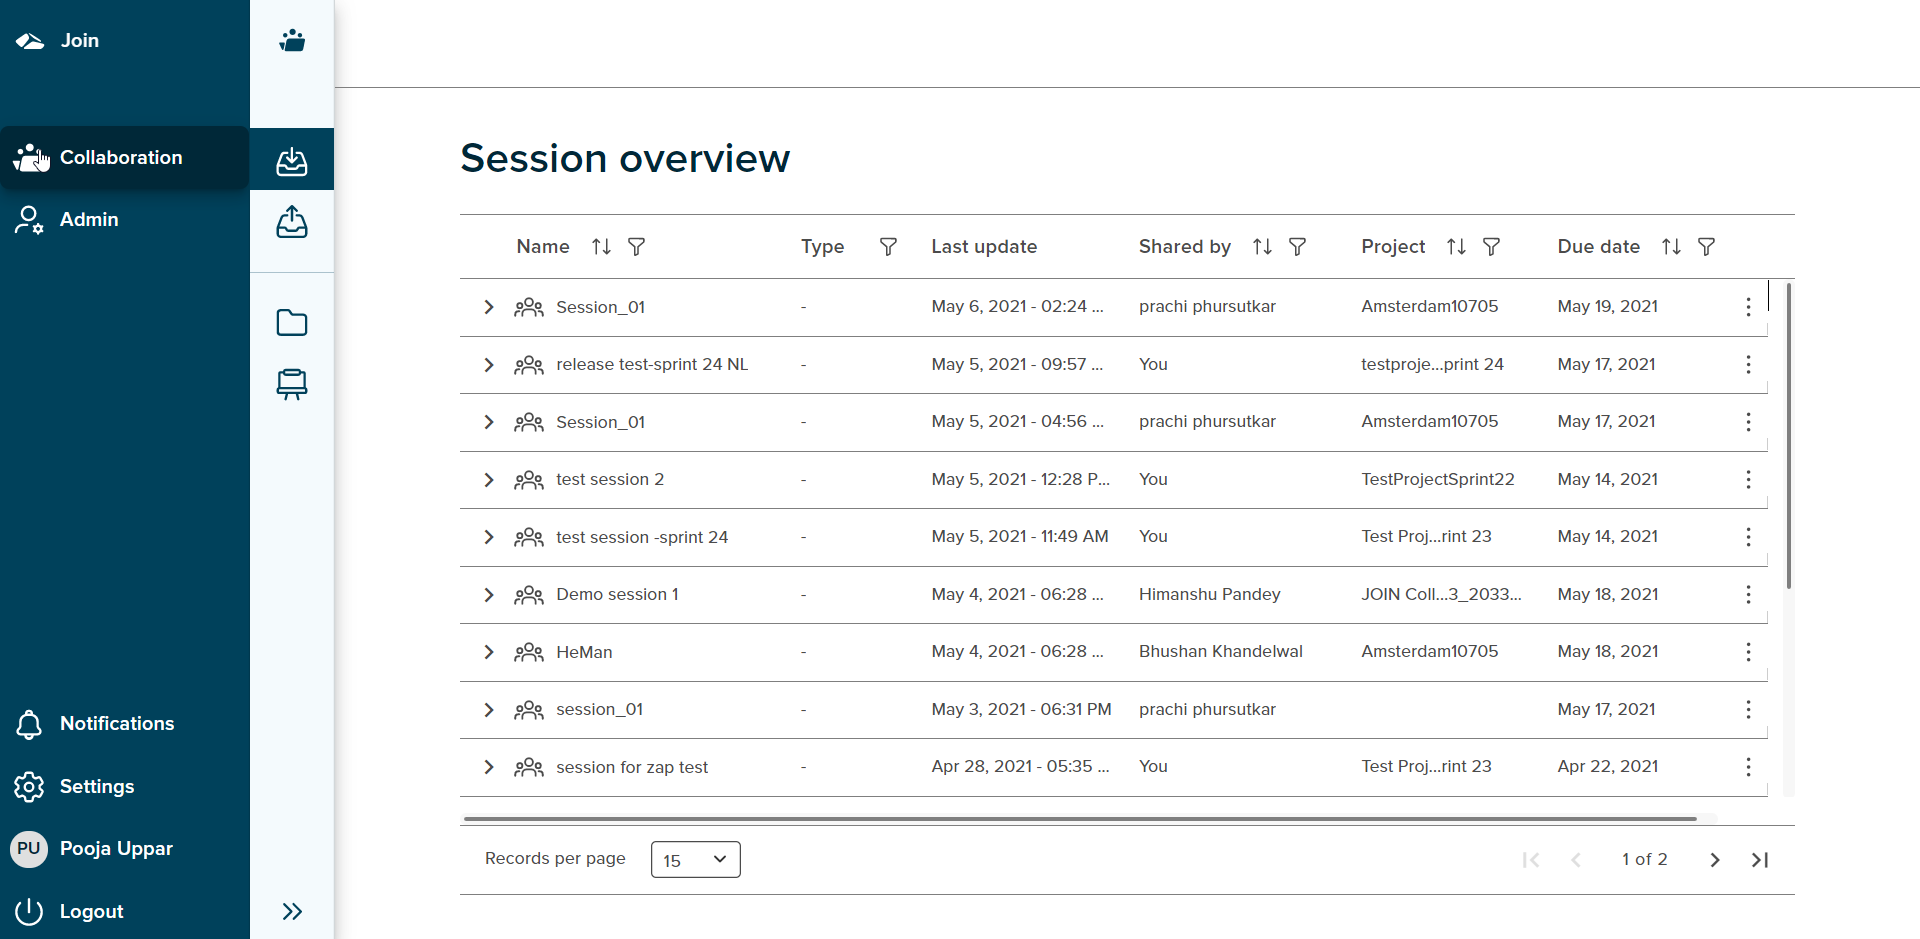
In the Collaboration project, the session overview is selected by default and it can be seen as highlighted in the collaboration menu bar. The collaboration menu can be collapsed and expanded using the double caret icon seen at the left side of the menu given at the bottom.
¶ Session Overview
This page displays the overview of the sessions shared by the session initiators. The session list comprises of session name, type, last update date, shared by, project name and due date fields.
¶ Session name
This is the name given by user during the session initiation process.
¶ Type
By default nothing is displayed here but on expand all the files in the session are visible and the file type is displayed.
¶ Last update date
This date shows the date and time of creation when the session was created. Ideally,whenever a user will make any changes in the session, the timestamp for the last update will be displayed in this field. This date is updated when user edits or comments on any file for a particular session.
¶ Shared by
Shared by column displays the session initiator’s name.
¶ Project name
The project name selected by user during session creation is displayed in this field.
¶ Due date
The due date selected by session initiator during session creation is displayed in this field.
Every session present on the session overview screen has a kebab menu which includes below options:
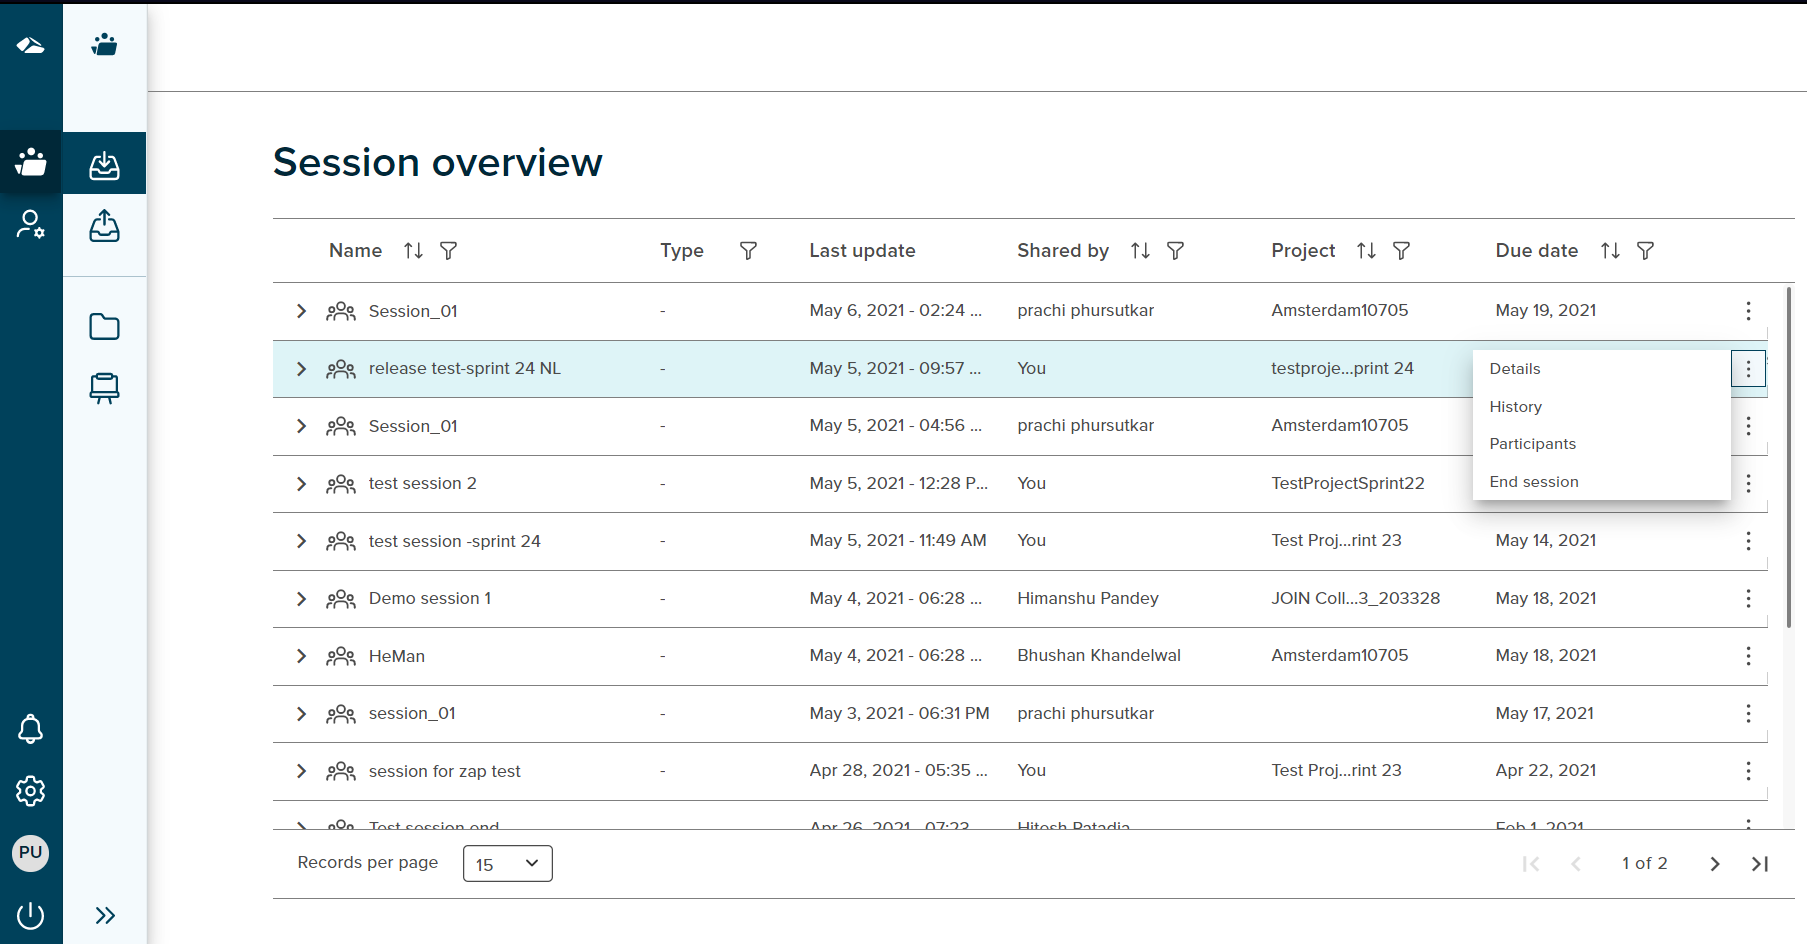
1. Details
It displays the details of session which consist of invitation, session details and shared files.
2. History
The history of the session including the date, time, activity and the username by whom the activity performed is displayed here.
3. Participants
Clicking on this Kebab menu option, the user is taken to ‘Participants’ page.
This includes the username and email address the of the participants in the session.
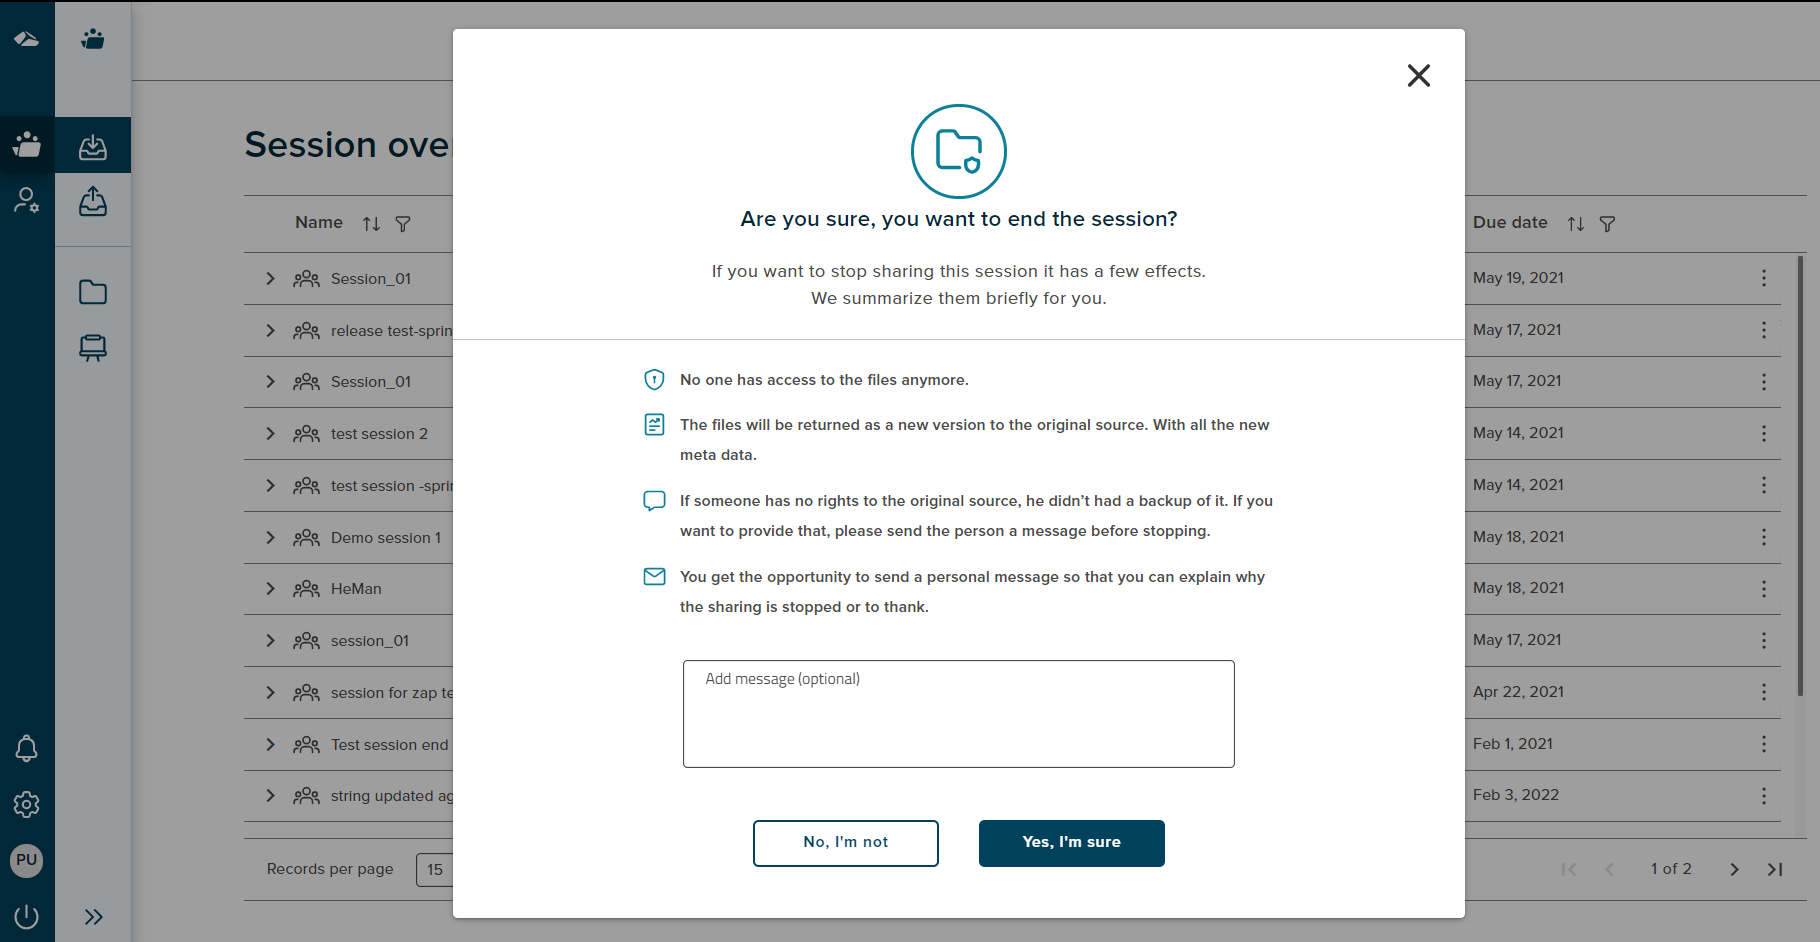
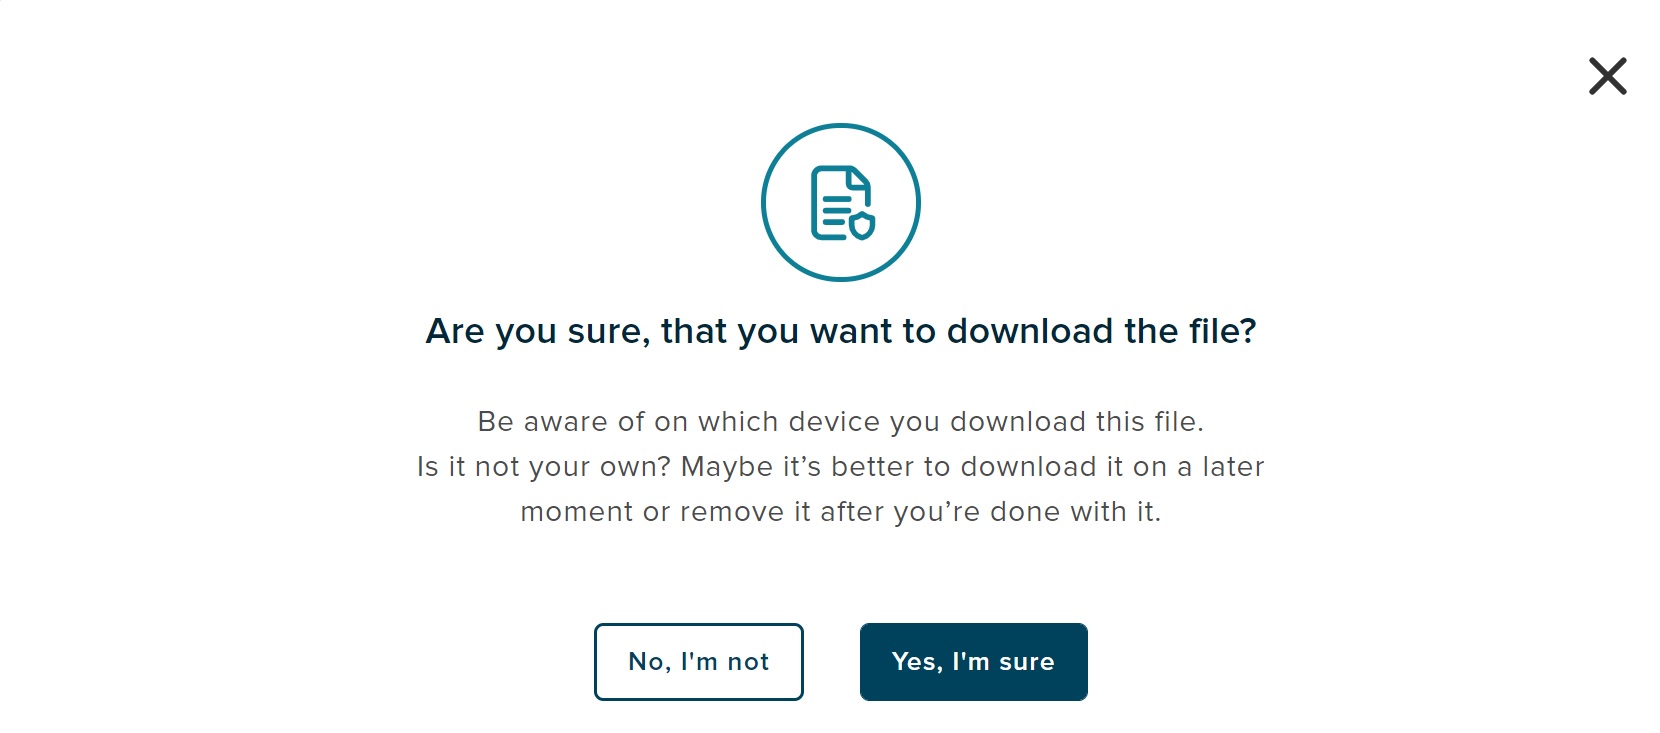
4. End session
End session feature allows a session initiator to end any of the existing sessions on the manage sessions page. The End session icon is seen on the right hand side of a session, on click of it a confirmation popup is shown with two options: 'No, I’m not", and “Yes, I’m sure”. On click of 'No, I’m not" button the user will be taken back to session overview page. On click of “Yes, I’m sure” button, the session ends and the session name is removed from the list on session overview page.
On the session overview page, when the user expands the session, all the files present in the session are displayed.
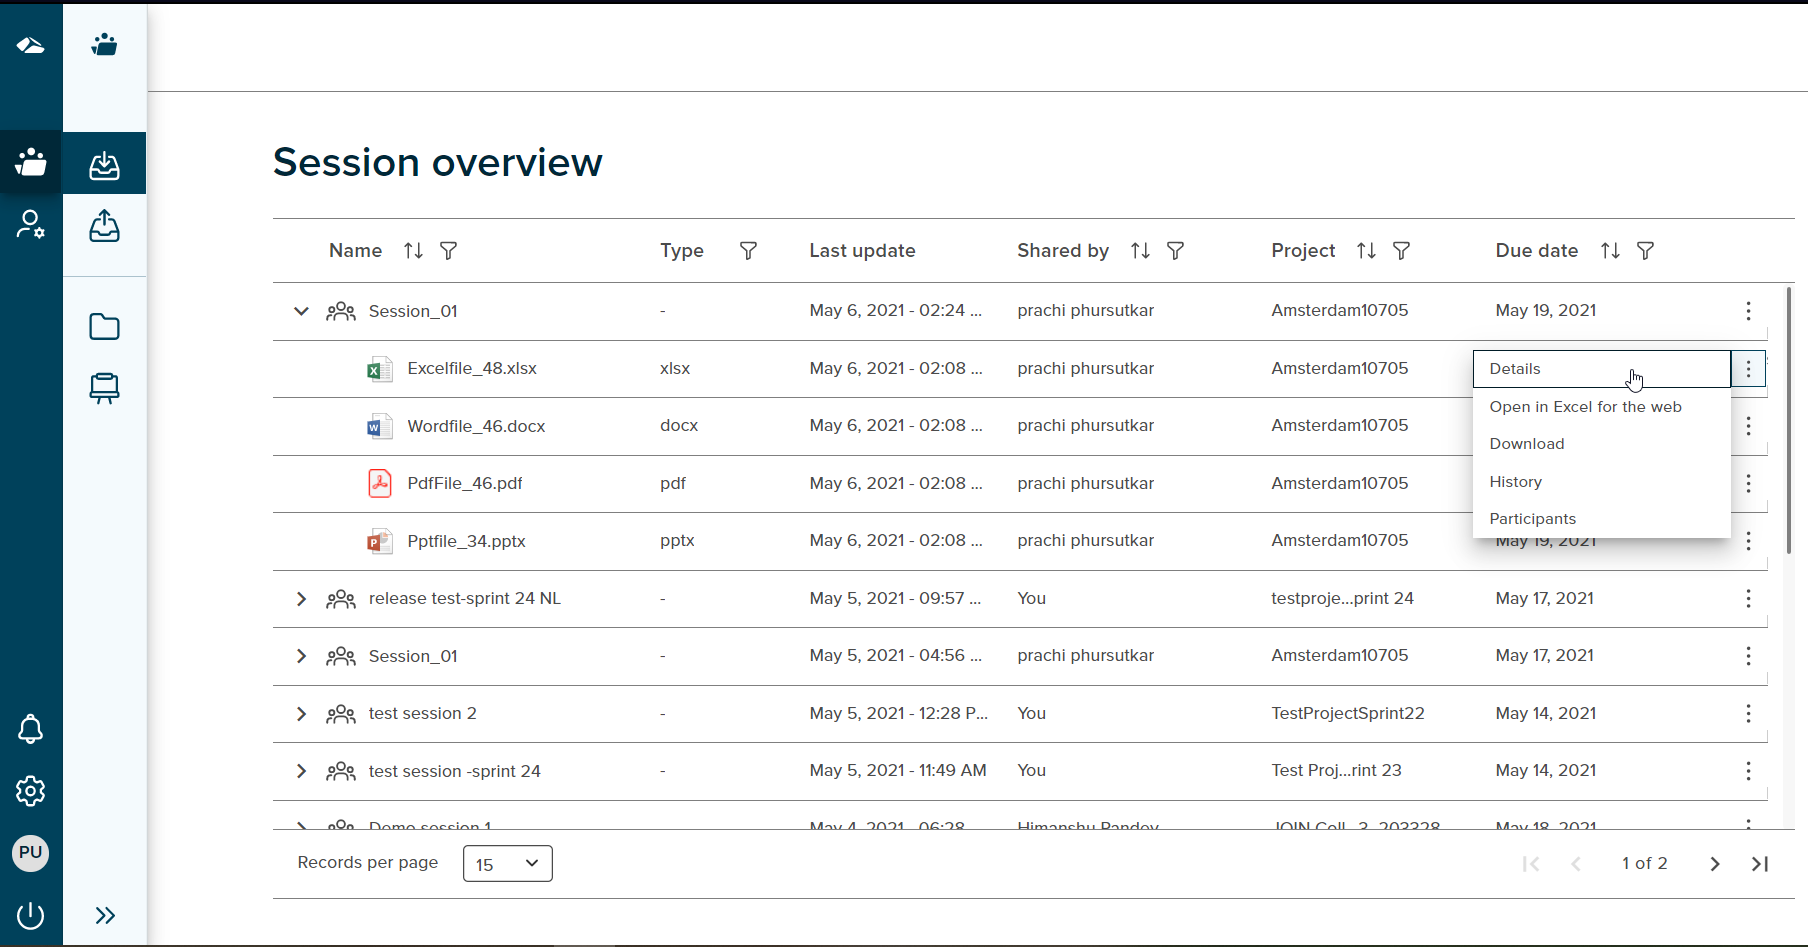
¶ 1. Details
It displays details for invitation and the specific file.
¶ 2. Open in ‘file type’ for the web
On select of this kebab option, the user can view and edit the file in the web browser. All the WOPI supported files like .docx, .pptx and .xlsx can be edited in the browser. Non WOPI Supported files have an ‘Open’ option.
¶ 3. Download
When the user clicks this option, a prompt is displayed to the user with two options: “No,I’m not”, and “Yes, I’m sure”. On click of ‘No,I’m not’ button, the user is taken to session overview page. On click of ‘Yes, I’m sure’ button, the file is downloaded.
4. History
The session history will be displayed.
5. Participants
Clicking on this Kebab menu option, the user is taken to ‘Participants’ page.
This includes the username and email address the of the participants in the session.
Features available in ‘Session Overview’ are as below:
Filters
Every field in the table has a filter icon next to it. On click of an icon, filter popup shows up and displays all the items present in the list. The popup includes Select All option, Ascending, Descending and search field box. User can search for the required content by typing it in search box. User can select one or more items by selecting the checkbox. Once selected, click on ‘Apply’ button to apply the changes. Click on ‘Cancel’ button will discard the changes.
Filter option in Name and Type column
On click of the expand icon next to the session name, file names present in the session are displayed in the filter list. User can then filter the list by selecting the desired items. The file type (.ppt,.pdf) will be displayed in the type field.
Sort
A Sort icon is present against every field which allows a user to sort and display the data in either ascending or descending or in a default order.
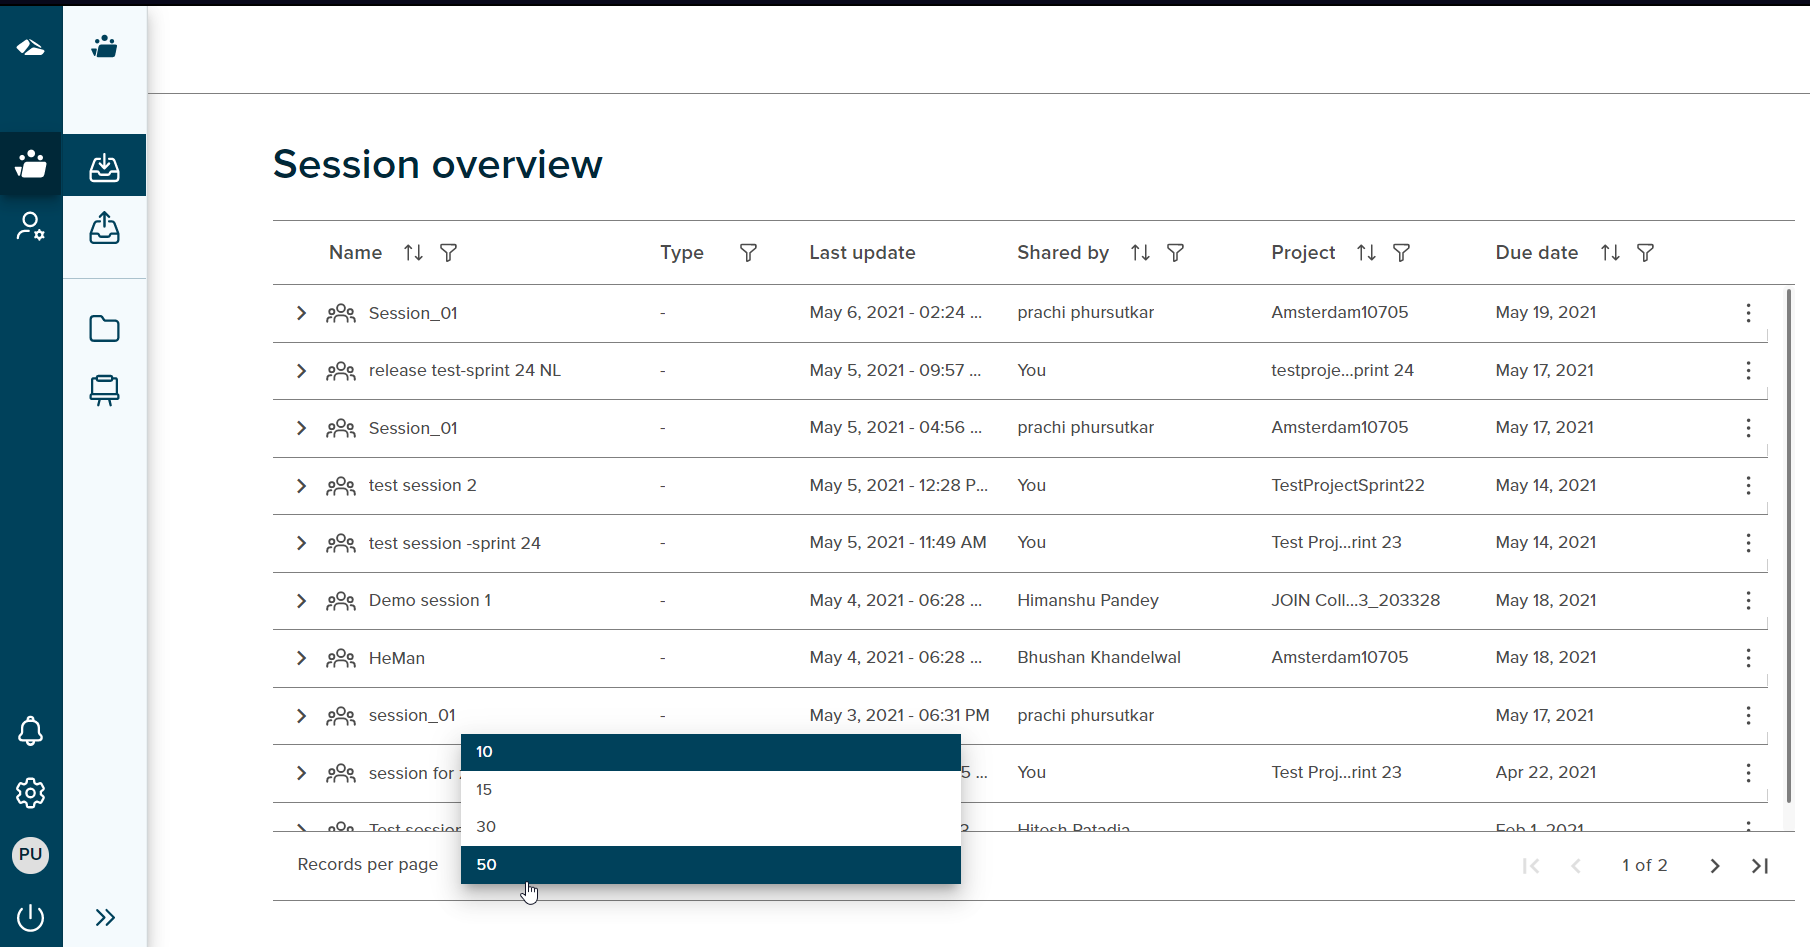
Pagination
User can control the number of items displayed per page using ‘Records per page’ button present at the bottom of the page. It contains various options i.e 10,15,30,50. These value depicts the number of items to be displayed per page. If the number of items per page exceeds the limit the feature of ‘Next’ and ‘Previous’ page icon is enabled at the bottom right corner and the user can navigate back and forth between the pages.