¶ Personal users
The Users menu item in the Admin portal includes Guest members. The list of personal user’s invited to a session are displayed here. The Platform admin can manage the personal users account in this section.
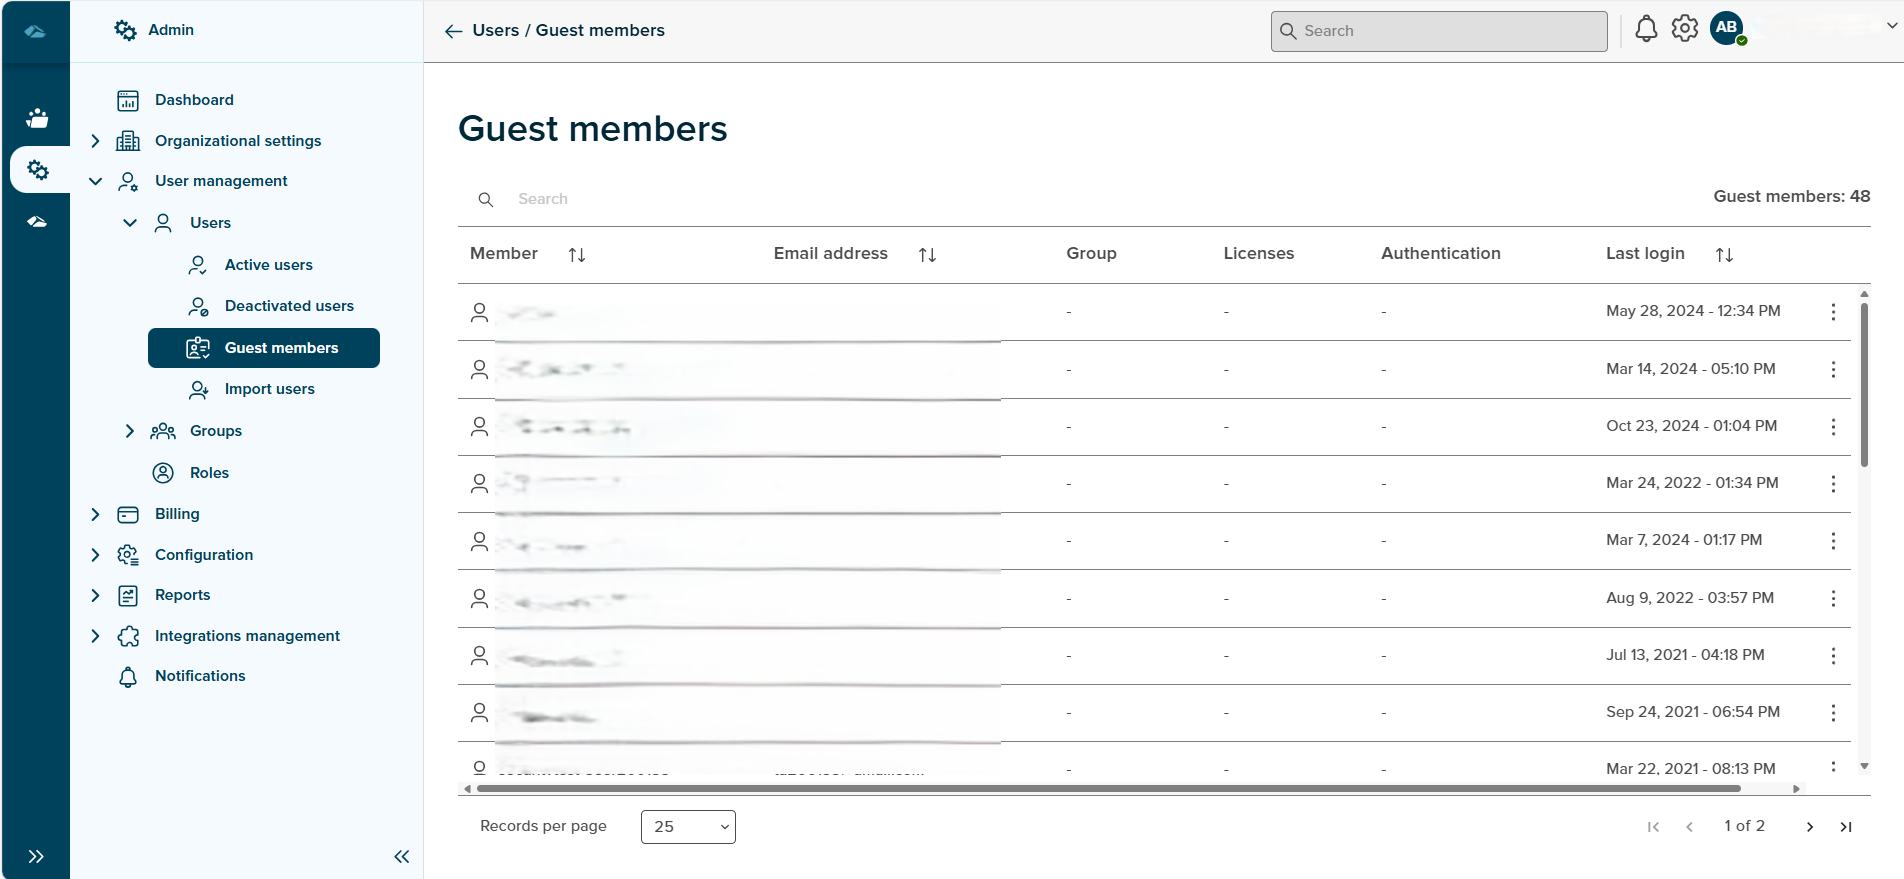
The breadcrumbs on the page include link to the Admin overview page. This page displays the count of guest members and the data columns such as Member, Email address, Group, Licenses, Authentication and Last login.
-
Members
This column displays the name of the personal users. -
Email address
This column shows the email address of a respective user against the user name. -
Group
This column informs the admin user the about the group. -
Licenses
The Licenses of a respective user are shown in this column. -
Authentication
This column shows the details of security methods enforced for a particular user in the organization to authenticate. -
Last Login
This column displays the date and timestamp of last login for a user.
In every row, against the active user a kebab menu is displayed with three dots. This includes Details and Manage Licenses.
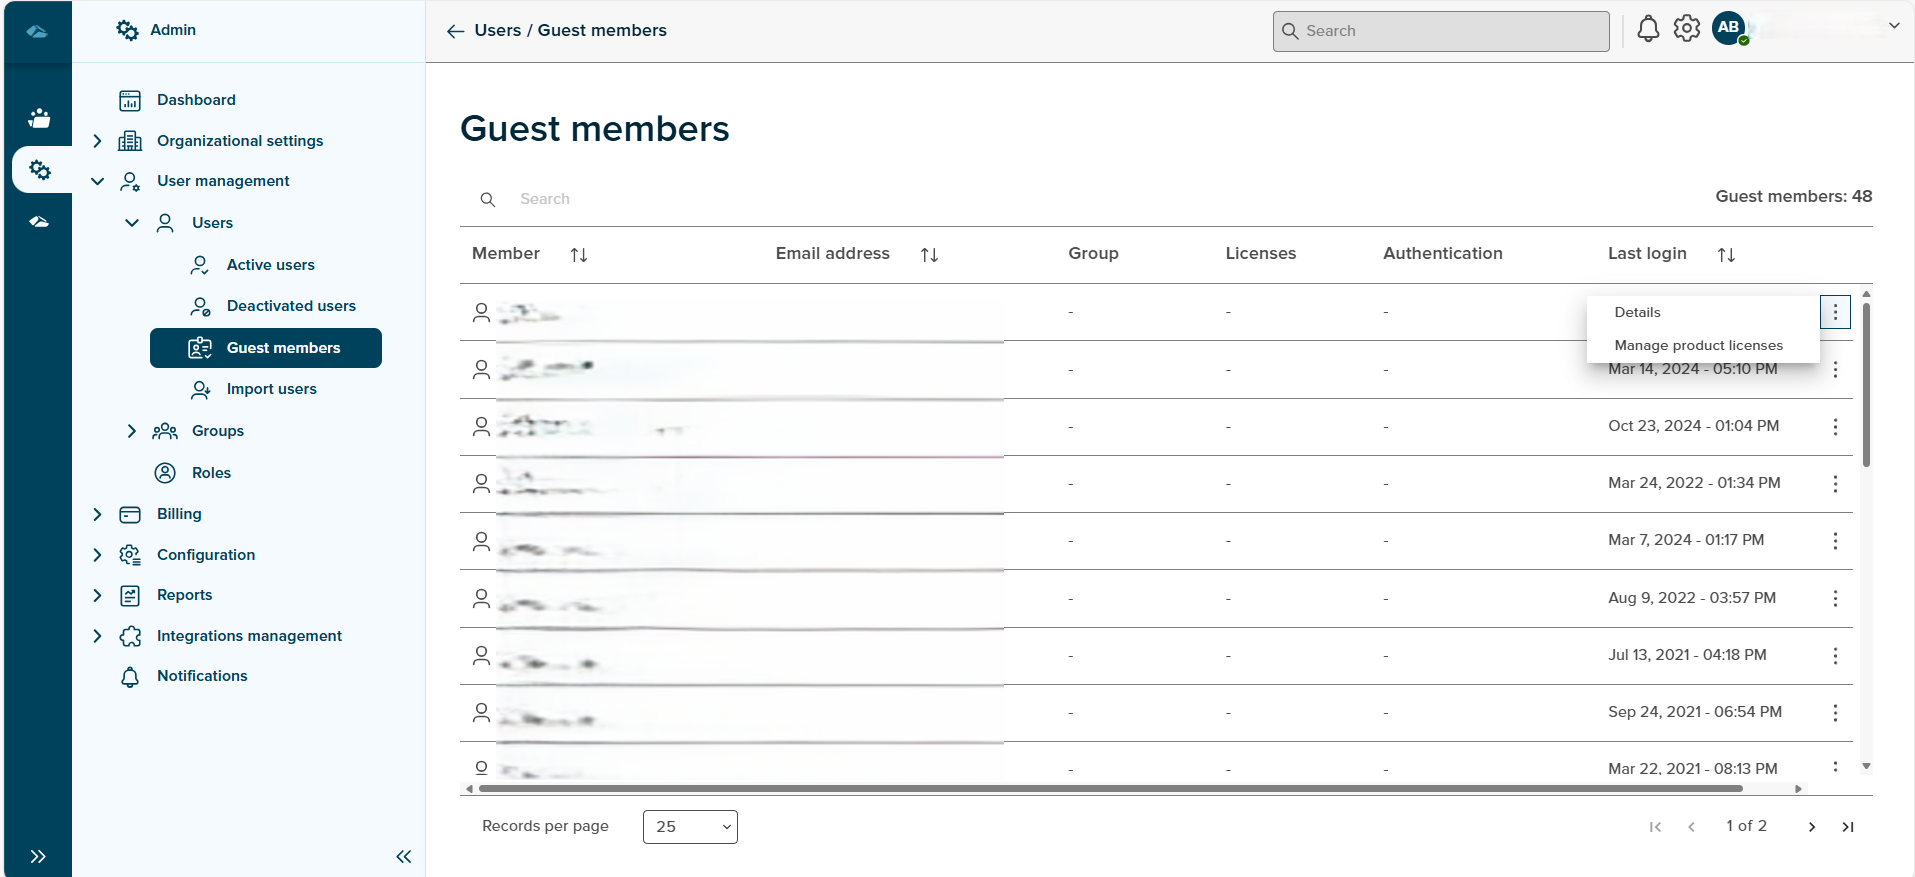
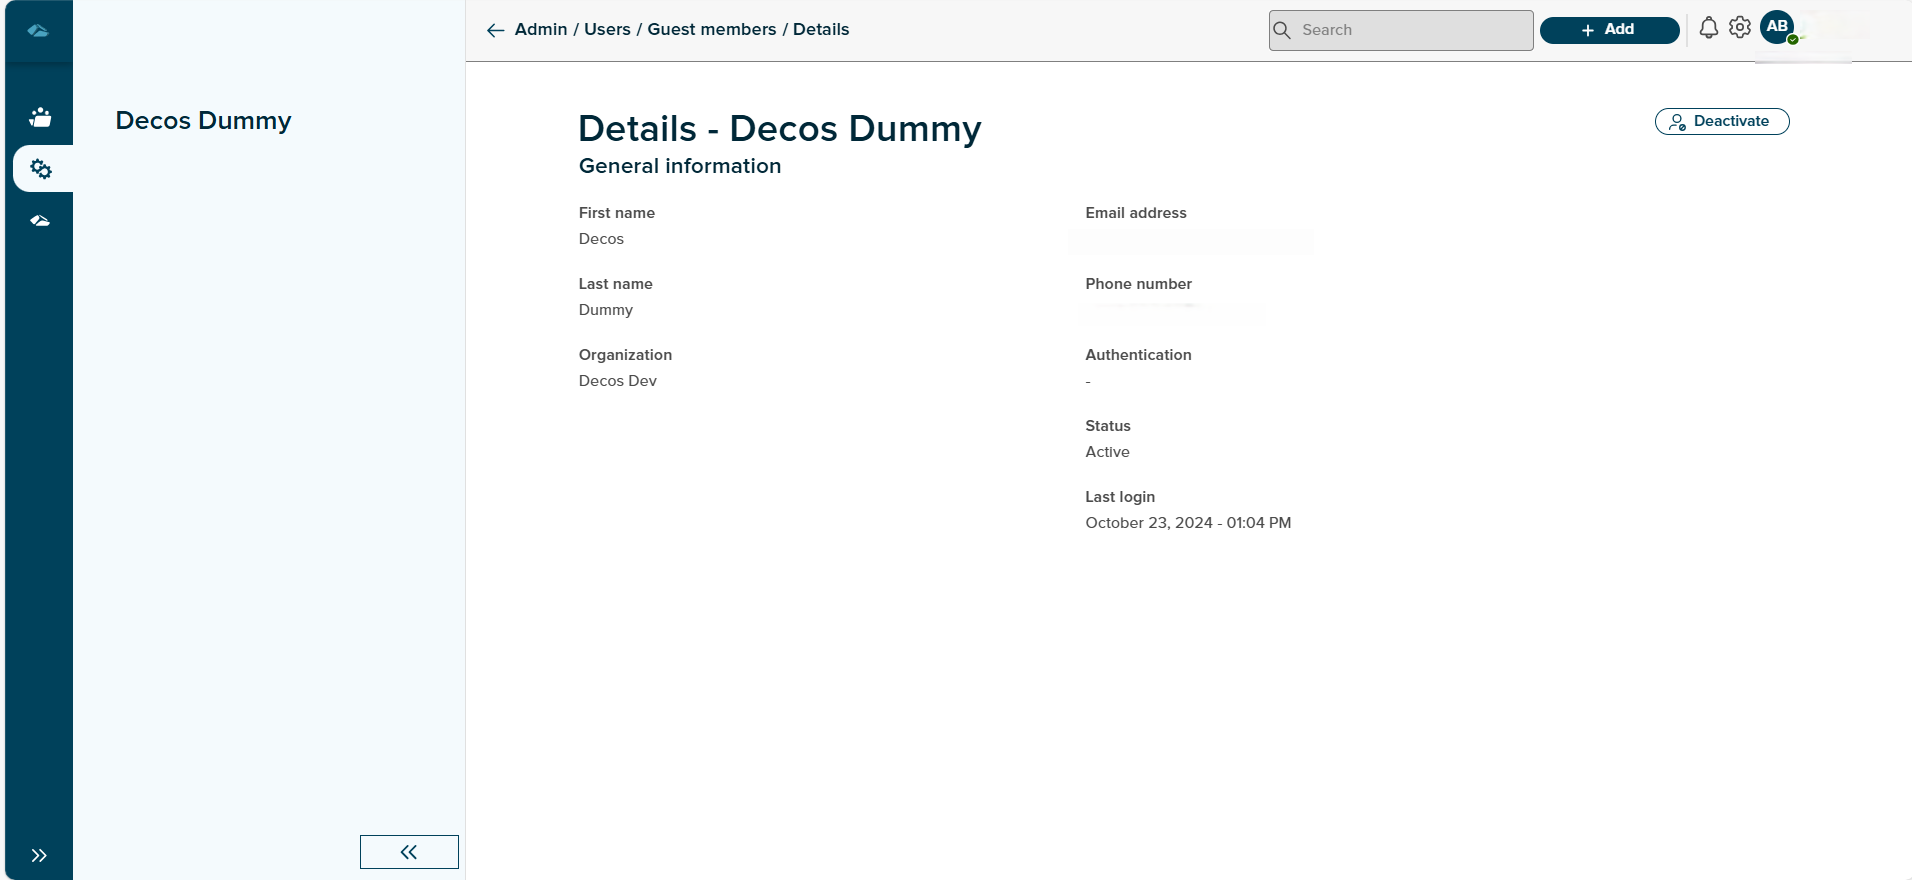
On click of the Details kebab menu item, the admin user lands on the user details page. This page consists of the general information such as First name, Last name. organization , email address, Phone number. Authentication, Status, Last login. The unlink member opens up the slider which is same as Manage License screen described below.
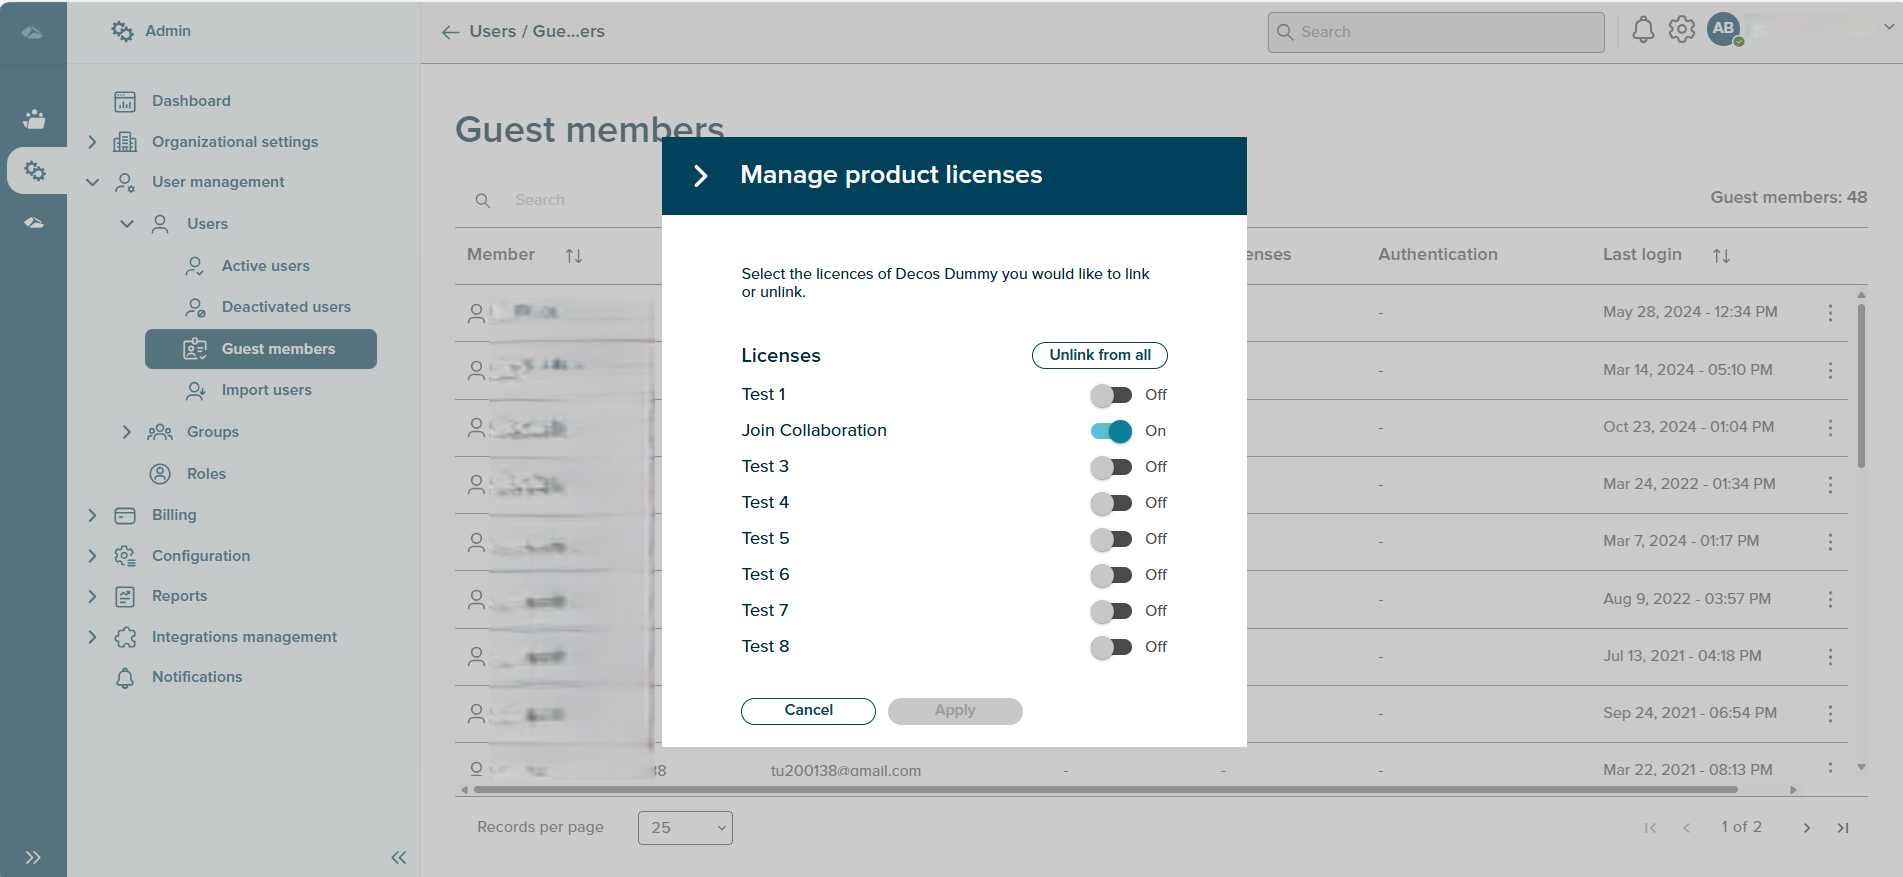
On click of Manage License kebab item,a sliding window is shown with a heading Manage License, licenses along with toggle switch, a Cancel button and the Apply button. When the licenses of a user are selected to unlink, the Apply button is enabled. On click of the Apply button, the user is unlinked from all the sessions for a particular tenant.The unlinked user is then removed from all the active sessions as a participant.
Features on this page include:
Search
The search box is available at the top of the user’s table. The search functions works when 3 letters or more than 3 letters are typed in the search field. The search function intakes data from Name and email address column only.
Sort
A Sort icon is present against every field which allows a user to sort and display the data in either ascending or descending or in a default order.